Sunday, February 28, 2010

Chocolate Peanut Butter Cupcakes

The desire to try this recipe came from, of course, the classic peanut butter and chocolate combination, Reese's peanut butter cups. I actually hadn't had one in a long time until my dad bought a Valentine's box of mini Reese's on sale after Valentine's Day. While I like Reese's, I have this weird thing about peanut butter where I only eat it when I truly desire to eat it. I know that sounds totally weird and confusing, but it's kind of like this: for example, I could eat chocolate all the time. I adore it, and can eat it over and over without ever getting sick of it. But with peanut butter, if I eat too much of it in a short amount of time, I get tired of it and lose interest. So many of the minis disappeared without me eating a single one. It wasn't until there were only a couple left that I had one and suddenly realized how I had forgotten about how good they were. So I had to try the combo in cupcake form!

I planned to make them as chocolate cupcakes with a peanut butter frosting, and in particular, was eyeing this recipe of Ina's. But it had a couple of things in the recipe that I usually don't keep on hand and I also finally decided that I wanted a predominantly peanut butter taste than chocolate. I felt that if I made chocolate cupcakes, the chocolate flavor would be stronger than the peanut butter, and I really wanted the peanut butter to shine. So I found this recipe on Allrecipes. One thing that really stood out to me was that the recipe had cream of tartar in it. I've never in my life seen a cupcake recipe or any cake recipe besides Angel Food that had cream of tartar in it. I also read some of the reviews and decided to use oil in place of shortening. And my lord, the resulting cupcake was INCREDIBLY soft and fluffy! I honestly don't think I've ever made cupcakes as soft as these, and I have to think that it was the cream of tartar that did it. It definitely got me thinking about finding other recipes that used tartar in it or even coming up with my own that has it in the recipe. In the end, the cupcake was delicious and definitely great for the first peanut butter cupcake recipe I tried. I paired it with my old standby chocolate buttercream and it had a nice, Reese's flavor. I eventually would like to try the reverse, chocolate cupcakes with peanut butter frosting, but for now, these were great.

Peanut Butter Cupcakes (adapted from Allrecipes)
I halved the recipe twice and had enough batter for 7 cupcakes. A read a lot of reviews that said they were able to get about 30 cupcakes, so assume that this full recipe will make about 28-30.

Ingredients
  • 2 cups brown sugar
  • 1/2 cup vegetable oil
  • 1 cup peanut butter
  • 2 eggs
  • 1 1/2 cups milk
  • 1 teaspoon vanilla extract
  • 2 1/2 cups all-purpose flour
  • 1 teaspoon baking soda
  • 2 teaspoons cream of tartar
  • a pinch of salt
Directions
  1. Preheat the oven to 350 degrees F. Line a cupcake pan with paper liners or grease and flour cups.
  2. In a large bowl, mix together brown sugar, oil, and peanut butter and beat until thoroughly combined. Beat in eggs one at a time, then stir in vanilla. Combine the flour, baking soda, cream of tartar, and salt in a medium bowl; stir into the batter alternately with the milk, starting and ending with the dry ingredients. Spoon into the prepared cups.
  3. Bake for 15 to 20 minutes in the preheated oven, until the top of the cupcakes spring back when light pressed (or until a toothpick inserted in the center comes out clean. Don't be fooled by the cupcakes like I was. I thought 15 minutes was too little as almost all cupcakes take at least 18 minutes to bake. The tops to me still looked a little wet and so I didn't even test them at 15 minutes. 2 minutes later they were starting to brown, although still looking a little wet on top, but I checked them anyway. Sure enough, they were done, so don't be fooled!) Cool in the pan about 10 minutes before removing to a wire rack to cool completely.
Creamy Chocolate Frosting (from Allrecipes)
This recipe makes enough to thinly frost about 24 cupcakes, so if you're making the full cupcake recipe, you may want to times the recipe by 1.5.

Ingredients
  • 2 3/4 cups confectioner's sugar
  • 6 tablespoons unsweetened cocoa powder
  • 6 tablespoons butter (I always use salted. If you only have unsalted, add a good pinch of salt)
  • 5 tablespoons evaporated milk (I always use regular 2% milk since I almost never have evaporated milk on hand. But if you have it, definitely use it)
  • 1 teaspoon vanilla extract
Directions
  1. In a medium bowl, sift together confectioner's sugar and cocoa powder. Set aside.
  2. In a large bowl, cream butter until smooth, then gradually beat in sugar mixture alternately with the milk. Blend in vanilla. Beat until light and fluffy. If necessary, adjust consistency with more milk or sugar (or cocoa powder). Use to frost cupcakes.
By the way, I totally meant to pipe a different kind of pattern on these cupcakes since I all too often just go back to the classic swirl. But there's just something about the swirl that captivates me and so I just did it by instinct! I think what I'm getting tired of is the fact that I actually only have one star tip, a Wilton #32 open star that I've used for all of the cupcakes I've posted so far. (The only other tips I have are two petal tips, a leaf tip, and a very small round tip that I actually haven't even used yet...I find trying to make buttercream flowers intimidating!) I've been dying to get a 1M tip that seems to be the standard for the classic swirl but just haven't dragged myself up to Michael's to get it. But luckily, tomorrow I have to head up there anyway to get some stretcher strips for a new painting of mine, so as long as I remember, I'm definitely getting it then!

Thursday, February 25, 2010

Chocolate Cookies

I think what I love about this recipe is its wonderful simplicity. No having to melt chocolate, or sift flour, or go through any complicated process really. In fact, it's so simplistic that it's been kind of hard to come up with what I want to say about them. I baked these cookies a couple of days ago, and started this post a couple of days ago...but for some reason I've felt a little unmotivated and unsure of what I wanted to say. But don't let that put you off of these cookies...they may be simplistic, but they're still delicious.

These cookies are buttery, chewy, and have a light chocolatey-ness about them, and I really love that. Not every recipe that has chocolate in it has to be deeply rich and dark. Of course, that's delicious every once in a while too, but now and then I like to have a much simpler chocolate treat and these cookies fit the bill. Made simply with cocoa powder and a nice dose of butter gives them a simple but tasty flavor and a chewiness that actually doesn't even require refrigeration. I'm usually a hugely strong supporter of refrigerating cookie dough, but this cookie will be chewy regardless of whether you refrigerate the dough or not, which is great when you're craving a nice, chewy cookie right then and there. White chocolate chips can be added if you like, although I actually prefer them plain. I'm not too sure where I found this recipe, as I printed it out a long time ago and the paper has been fortunate enough to not get ingredient spills all over it, so just know that this isn't my recipe.

Chocolate Cookies
If you're like me and make slightly larger cookies, this recipe should yield about 2 dozen.

Ingredients
  • 1 cup unsalted butter, softened
  • 1 1/2 cups sugar
  • 2 eggs
  • 2 teaspoons vanilla
  • 2 cups unsifted all-purpose flour
  • 2/3 cup Hershey's unsweetened cocoa powder
  • 3/4 teaspoon baking soda
  • 1/2 teaspoon salt
  • 2 cups white chocolate chips (optional)
Directions
  1. Preheat the oven to 350 degrees F. Cream butter, sugar, eggs, and vanilla until light and fluffy.
  2. Combine flour, cocoa powder, baking soda, and salt; add to creamed mixture. Stir in white chocolate chips if using.
  3. Drop by teaspoonfuls onto ungreased cookie sheet, or chill until firm enough to handle and shape small amounts of dough into 1 inch balls. (I just use two spoons to drop dough onto the sheet. I used probably at least 1 1/2 tablespoons of dough for each cookie.)
  4. Bake cookies for 8-10 minutes, or until edges seem set and crisp while inside still appears puffed and chewy.
I forgot that I wanted to make some with white chocolate chips, so I hurriedly pressed some into two of the cookies halfway between baking.


But like I said, I do still enjoy these best when they are plain and simple without anything to hinder the wonderfully chocolate, buttery flavor. Enjoy!

Friday, February 19, 2010

Banana Bread

Do you ever feel as if you only enjoy a fruit when it's in its straight from the grocery store form? As in, you love the fruit as it is, but you just don't seem to like it when it's in any kind of dessert or baked good? Well, maybe not, but I certainly feel that way about a couple of fruits, and one of which is banana. I love bananas as is, but things like banana cream pie, banana pudding, even the banana/peanut butter combo, I'm just not a fan. Though, I do have a couple exceptions. One of them is Banoffee Pie. The other is banana bread...THIS banana bread. I've tried banana bread in the past, but for some reason, they just didn't do it for me. And so I became convinced that I just didn't like the stuff. But one day I had a couple of super ripe bananas laying around that needed to be used, and came across this recipe on Diana's Desserts and decided to give it a go. And...it's fantastic!

I think what I love about this banana bread is that it doesn't have a super strong banana flavor to it that always seemed to put me off of other banana breads I tried. Who knows? For all I know, the ones I've tasted in the past could have had some artificial or even pure banana extract added to them, and I just wasn't a fan. This bread also has cinnamon added to it, which is, in my opinion, such a great compliment. It is also incredibly moist, coming from not only the bananas, but from buttermilk and applesauce to give it a triple boost of moistness. It's perfectly sweet, and even better the next day after the flavors get a chance to mingle and harmonize and is the perfect addition to morning coffee or a hot cup of tea. All in all, I must say brava. It was enough to convert me and my finickiness, so I'd definitely say to give this bread a try.

Super ripe bananas. At one point, I was worried they might be too far gone, but they were just fine. :)

Buttermilk Banana Bread (From Diana's Desserts)
This recipe is halved in order to make one 9x5 inch loaf. If you'd like to make both loaves, you can double the recipe, or visit Diana's post here.

Ingredients
  • 2 cups all-purpose flour
  • 2 teaspoons baking powder
  • 1/2 teaspoon baking soda
  • 1/2 teaspoon salt
  • 1/2 teaspoon ground cinnamon (I used a little more to make up for the fact that I didn't include the other spices)
  • 1/16 teaspoon ground nutmeg (I omitted. You can just eyeball this by filling your 1/8 teaspoon half full.)
  • 1/16 teaspoon ground ginger (Again, I omitted, and just eyeball it.)
  • 1/2 cup granulated sugar
  • 1/4 cup brown sugar (light or dark), firmly packed
  • 1/2 cup (1 stick) unsalted butter OR 1/2 cup vegetable oil (I always use vegetable oil)
  • 2 large eggs, lightly beaten
  • 1/2 cup fresh buttermilk
  • 1 teaspoon vanilla
  • 2 large ripe bananas, mashed
  • 1/4 cup applesauce (You can use sweetened or unsweetened. I've used both in the past and find that it makes no difference.)
  • 1/2 cup pecans or walnuts, chopped (optional) (I don't like nuts in bread, so I always omit)
Directions
  1. Preheat the oven to 350 degrees F. Spray one 8 1/2 x 4 1/2 inch loaf pan (or a 9x5) with nonstick cooking spray and, if desired, line the bottom of the pan with parchment paper; spray parchment paper also. (I sprayed mine with nonstick cooking spray and then dusted with flour.)
  2. In a large mixing bowl, whisk together flour, baking powder, baking soda, salt, cinnamon, nutmeg, ginger, and both sugars. Mix thoroughly; set aside.
  3. In a medium size mixing bowl, mix together the melted butter (or oil), the lightly beaten eggs, the buttermilk, and the vanilla. Stir into the flour and mix just until combined. Do NOT overmix. Fold in the bananas, applesauce, and the chopped nuts, if using.
  4. Pour the batter into the prepared loaf pan. Bake for 55-60 minutes or until a toothpick inserted into the middle of the loaf comes out dry. Transfer loaf to a cooling rack and let cool in pan for 15 minutes, then invert the loaf onto the rack to let cool completely.
**Note: This bread keeps quite well tightly wrapped in plastic wrap for up to five days at room temperature or 3 months in the freezer. Can also be stored in the refrigerator if necessary.

Oh, and also. This banana bread recipe can easily be turned into muffins, if you so wish. That's actually what I usually make this recipe as. Just increase the oven temperature to 375 degrees F and bake for about 20 minutes and voila! =)

Thursday, February 18, 2010

Lost Obsession: Fish Biscuits

So...I didn't end up making anything for Valentine's Day. In the end, I just didn't feel up to it. But never fear...I do plan on making both things I considered at some point. The first thing I thought about making was a red velvet cheesecake, but discarded it being as I didn't feel like leaving the house to get cream cheese, sour cream, etc. Then I thought of Mexican chocolate cupcakes filled with homemade caramel and then topped with a boiled frosting...but like I said, I lost motivation, ha ha! But I still would love to try both of those, so I'll keep them on my To Try list and eventually I'll get around to them.

Anyway, if you don't watch Lost, you're probably wondering what the heck a fish biscuit is...and it probably doesn't sound too appetizing either! Well, here is the ultimate display of how obsessed I am with Lost. In season 3, one of the characters, Sawyer (played by the gorgeous Josh Holloway...certainly an incentive to watch!) is captured by a group dubbed "The Others" and is put in a cage for keeping. In this cage is a contraption, and if you're able to figure it out, it rewards you with a fish biscuit! As I was rewatching this episode, I had the craziest urge to try and make some. So I went on Google and lo and behold, I found this blog that had a recipe, instructions, and she even included a template for the fish biscuits! Awesome! Glad to know I'm not the only one with this Lost-obsessive idea! Of course, the "biscuits" are actually just a rolled sugar cookie recipe, so there's nothing fishy about this recipe except for the shape. If you aren't a fan of Lost, you should become one, as it's an excellent show. Hulu is streaming every single episode of Lost through December 31 this year, so even though the last season is now airing on ABC, it's never too late to become a fan! Or, of course, if you're not interested in becoming a fan (I'll just pretend like I didn't hear that), this is still a great dough for any shape you want it to be.

Rolled Sugar Cookies for Fish Biscuits (adapted from Epicurious)
Makes about 5-7 large fish biscuits

Ingredients
  • 2 cups unbleached all-purpose flour (I used bleached, since that's what I had)
  • 1 1/2 teaspoons baking powder
  • 1/4 teaspoon salt
  • 3/4 cup (1 1/2 sticks) unsalted butter, room temperature
  • 1 1/4 teaspoons grated lemon peel (I omitted)
  • 1 1/4 teaspoon grated tangerine or orange peel (I omitted this as well)
  • 1/2 cup sugar
  • 1/4 cup powdered sugar
  • 1 large egg
  • 1 1/2 teaspoons vanilla butter & nut extract
  • couple drops red food coloring
  • couple drops yellow food coloring
** This sugar cookie recipe can pretty much be flavored with whatever you like. The original recipe on Epicurious used citrus zest, but I used McCormick's vanilla butter & nut extract, the same I used for the yellow cupcake recipe. You can easily substitute any extract you like, such as vanilla or almond, etc., to taste.

Directions
  1. Sift the flour, baking powder, and salt into a medium bowl. Using an electric mixer, beat the butter, grated lemon peel, and grated tangerine/orange peel until light (since I didn't use zest, I just beat the butter by itself. Don't add any extracts yet.) Add the sugar and powdered sugar and beat until fluffy.
  2. Beat in egg and extract. Add food coloring a little bit at a time, working until you have a nice, rich salmon color. Keep in mind that the color will fade slightly when baked.
  3. Add dry ingredients a little bit at a time until fully incorporated. Divide dough in half and wrap the dough in plastic wrap, forming two disks. Store in the refrigerator for at least 4 hours or overnight until set.
This is the color you're looking for.
Making the fish biscuits:
  1. Preheat the oven to 300 degrees F. Line a large cookie sheet with parchment paper.
  2. Generously flour your work surface and rolling pin. (I rolled out my dough on a piece of parchment paper which I also floured. I found that this really worked best.) Place one disk of dough on the floured surface, and flour the top. Roll out dough to about half an inch in thickness. Place fish biscuit template on the dough and cut around the template using a sharp, floured knife.
  3. Continue rolling and cutting dough, making sure to keep leftover dough scraps for additional cookies and placing the cut out fish biscuits on your prepared cookie sheet. Depending on your estimated thickness, you should get about 5-7 fish biscuits. (I got 7, but the original blogger said 4-5...I guess I wasn't making mine as thick as hers!)
  4. Once all fish biscuits have been cut out, fold the template in half and place on fish biscuit. Using a small rounded butter knife (I actually found that a toothpick works best!!), gently press in the top or bottom half of the Dharma logo letters. (Do whichever side you're more comfortable with. The original blogger pressed in the bottom half of the letters first, but I found it easier to press in the top half of the letters first.)
  5. Remove the template and then press in the other half of the letters. Continue doing this for each fish biscuit. (The name DHARMA comes from a group called the DHARMA Initiative who were scientists who came to study the island and who were supplied with food with their logo on it...for more info on them, you can click here.)
  6. Bake the fish biscuits for 15 to 20 minutes until they no longer give when pressed. Cool for 5 minutes on the baking sheet and then transfer to wire rack to cool. Serve warm or at room temperature and watch your favorite Lost episode as you enjoy! For the fish biscuit template and printable recipe and directions, please visit the original blogger's file here. (Must be able to see pdf files.)

Thursday, February 11, 2010

Rick Katz's Brownies for Julia

I know, I know...I've been bad. I said in my last post that I was going to try to not bake anything until Valentine's Day. But, this week's recipe for the TWDers was this fabulous brownie recipe that sounded like the exact type of brownie I love: ooey, gooey, and barely set. Yum! Upon looking at the recipe, I found out that it was basically the same brownie recipe as one that's been sitting on my To Try list for a while. Plus, all of my classes have been canceled this week and it's been a wintery wasteland outside like I've mentioned in my previous posts, so even though I'm not a member of Tuesdays with Dorie, these brownies begged me to make them, honestly! Ha ha. I think I'll still end up making the recipe I wanted to make for Valentine's Day. That is, if I can ever get out and get the ingredients with all this snow! I might just scale down the recipe and make individual portions. As to what recipe I have in mind, you'll have to wait until Valentine's Day to find out.

Like I was saying, this recipe is amazingly ooey and gooey, probably the most gooey brownies I've ever made! A lot of members of TWD said that they found a problem with that, and most baked their brownies a lot longer or just baked them in a larger pan in order to compensate. But I fully believe that a cooked-all-the-way-through brownie is an absolute crime! I saw one comment on the same recipe labeled "Best Ever Brownies" where the woman actually baked these things until a toothpick came out clean and I just about died!! So if you're looking for a really cakey recipe, this one is certainly not for you! But if you're like me and love an absolute sinful, chocolately, gooey, melt-your-mouth brownie, this one's a keeper! I'm not going to share the recipe here, so please go on over to the blog Chocolatechic for the brownie recipe. But I will share some photos of the baking process.

Melting the butter and chocolate. And there's a lot of it in this recipe! If you're looking to get on a diet, or looking for a lighter recipe, turn away now, ha ha!

An interesting thing about this recipe is that you stir in half of the sugar/egg mixture into the melted chocolate and butter and then whip the other half until the eggs have gotten really light and doubled in volume. I actually went through the same process of whipping the eggs for the chocolate espresso cookies in my second post, which also came out as more like a brownie batter than a cookie dough. Interesting!

The rest of the brownies. The recipe, I believe, calls for you to bake the brownies for 25-30 minutes. I baked for 30 and they were nice and gooey. I got impatient and cut a piece after only about 30 minutes of cooling, so you can see how the recipe really oozes. After I ate my piece, I placed these brownies in the refrigerator to set up a little more. They'll still be super gooey, but they won't ooze like how you see in the picture.

A close up of my slice. Yum! You can also see that the brownies have a nice, crackly, crispy top on them which is nice paired with the melt-in-your mouth gooey-ness. If you absolutely insist that you want your brownies to be more firm and you really want to try this recipe, I'd suggest baking your brownies upwards of 35-4o minutes or even adding about another 1/2 cup of flour to them. Just remember to watch them.

So try these brownies! They really are excellent, and I think I'll be using this as my go to recipe from now on! Until Valentine's Day!

Monday, February 8, 2010

Brown Sugar Cupcakes with Brown Sugar Caramel Buttercream

Phew! Rather long title, huh? I decided that was a little too much for the photo, so I left it out, ha ha. I've been making a lot of cupcakes recently, but at least have been getting quite a workout shoveling snow! 28 inches was the official measurement by our yardstick! And we're due to get more snow tomorrow afternoon, 10-15 inches, according to the news!! I don't think our area has ever gotten so much snow in so little time, it's ridiculous! But, it's been closing schools, so that's been one positive thing about it.

Anyways, back to the cupcakes. These are awesome, the cupcake is incredibly moist, and the buttercream is simply delicious! The cupcake part I've actually tried once before, so I knew that would be good, but the buttercream was new to me, so I was really eager to try it out. It's a Swiss Meringue buttercream, made with brown sugar and then finished off with a large amount of homemade caramel sauce thrown right into the frosting. Yum! I really seem to be on a caramel binge here recently, and that does happen to me from time to time (caramel and malt seem to be most popular with me!). I've also had toffee bars on the mind, using the caramel recipe I made for the Banoffee Pie in my very first post. Those might be making an appearance on here in the near future! Though I'm going to try to not bake anything from now until Valentine's Day, just to be good, unless it's for breakfast. I don't think I ever realized how much sweets I made until I actually started documenting them on this blog, ha ha! Anyways, on to the recipes!

Brown Sugar Cupcakes (Originally under the name Salted Caramel Cupcakes from Cupcakes by Shelly Kaldunski)
Makes 12 cupcakes

Ingredients
  • 1 1/4 cups all-purpose flour
  • 3/4 teaspoon baking powder
  • 1/4 teaspoon salt
  • 1 cup firmly packed dark brown sugar (I used light)
  • 1/2 cup granulated sugar
  • 1/2 cup (1 stick) unsalted butter, at room temperature
  • 2 large eggs, at room temperature
  • 1 teaspoon vanilla
  • 1/2 cup whole milk (I used 2%, and that's fine)
Directions
  1. Position a rack in the middle of the oven and preheat the oven to 350 degrees F. Line a standard 12-cup muffin tin with paper liners.
  2. In a bowl, whisk together the flour, baking powder, and salt. In another bowl, using an electric mixture on medium-high speed, beat the sugars and butter until light and fluffy, 2-3 minutes. Add the eggs and vanilla and beat until combined. Add flour mixture in 3 additions, alternating with the milk in 2 additions, beating on low speed just until combined; scrape down the sides of the bowl as necessary.
  3. Divide the batter evenly among the prepared cupcake liners, filling each about two-thirds full. Bake until a toothpick inserted in the center comes out clean, about 18-20 minutes. Let the cupcakes cool in the pan on a wire rack for 5 minutes. Transfer the cupcakes to wire rack and cool completely, about 1 hour.
After you put the cupcakes in the oven, immediately begin working on the caramel sauce.

Caramel Sauce (doubled from Debby Maugans Nakos' Small-Batch Baking)
Makes about 1 cup

Ingredients
  • 1 cup sugar
  • 1/4 cup water
  • 3/4 cup heavy cream
Directions
  1. Combine the sugar and water in a medium saucepan over medium-high heat. Bring to a boil, stirring occasionally, until the sugar dissolves, about 3 minutes. Reduce heat to medium and cook, swirling the saucepan frequently, until the sugar syrup is golden amber in color, about 7 to 9 minutes.
  2. Remove the pan from heat and gradually add cream, stirring slowly and carefully - the caramel will sputter when the liquid is added. The sugar will seize and harden. Return the pan to the heat and continue cooking until the sugar melts again, about 2 minutes. Pour into a bowl and cool to room temperature, stirring occasionally. (Your caramel sauce may seem rather liquidy at first, but will thicken upon cooling.)
Brown Sugar Caramel Swiss Meringue Buttercream
Makes enough to frost 12 cupcakes

Ingredients
  • 3 large egg whites
  • 3/4 cup brown sugar
  • pinch of salt
  • 3/4 cup (1 1/2 sticks) unsalted butter, room temperature
  • caramel sauce, to taste
Directions
  1. Place egg whites, brown sugar, and salt in a large heatproof bowl and fit the bowl over a large pan of simmering water (double boiler style). Whisk the egg mixture constantly until the mixture feels hot to the touch and no longer grainy when rubbed between your fingers, about 5 minutes (and about 160 degrees F on a candy thermometer).
  2. Put the egg mixture into the bowl of a stand mixer fitted with the whisk attachment and beat on high until the mixture is light and fluffy and hold stiff peaks. Continue beating until the whipped egg whites come to room temperature. (Feel the bowl for this...if it no longer feels warm at all, then it's good to go.)
  3. Switch to the paddle attachment, and with the mixer on low, add the butter 1 tablespoon at a time, waiting a couple of seconds before adding the next tablespoon. Increase the speed to high and beat until the mixture is thick and creamy, 6 to 10 minutes. The mixture may appear to be curdled during this time...don't freak out, just keep beating and it will come back together! (Some people also may experience the buttercream seeming very liquidy...again, just keep beating and it will thicken up!)
  4. Once the mixture is thick and smooth, add the cooled caramel sauce a little bit at a time, to taste. You will not likely end up using all of the caramel sauce. Start out adding about 1/4 cup, and increase the amount to your liking.
To Assemble
  1. Frost the cupcakes with your favorite decorating tip or knife/spatula.
  2. Drizzle the cupcakes with any of the remaining caramel sauce, if you wish. Enjoy!

Saturday, February 6, 2010

Yellow Cupcakes with French Silk Frosting

Here on the east coast we're currently getting SLAMMED with snow! And when I say slammed, I mean it! The numbers they've been predicting on the news has grown and grown, and it currently stands at 20-30 in, and I certainly believe them! A small tree in my front yard is currently totally weighted down with snow and my little Volkswagen Beetle is practically covered, ha ha! Anyways, I actually made these cupcakes two nights ago, but didn't get around to blogging them since I still had to blog about the light CC cookies, and didn't feel like typing up a whole nother post, but here I am now, and trust me, this recipe is absolutely delicious and one of my favorites!

What makes this recipe so delicious and addicting is certainly thanks to the vanilla butter & nut extract that McCormick makes! I discovered the cupcake recipe and the info about the extract on How To Eat a Cupcake. She had said that the extract was practically like yellow cake mix in a bottle! Yum! Even though I fully believe in baking from scratch, I do have a soft spot for the flavor of boxed cake mixes, being as that's what I grew up with. The extract really makes the cake, and while you could substitute with vanilla, it just won't be the same, so I suggest searching your store for this wonderful extract. Yes, it is imitation, but with all the processed foods we eat now anyway, I assume a tiny bit of extract in a cake recipe won't do much more harm. There were two bottles in just one store in my town and as soon as I made this recipe, I went back and bought the other bottle just in case they ran out and didn't restock!Also, the French Silk frosting is wonderful as well! French Silk refers to the light chocolate flavor like you get in a French Silk pie. It's an American buttercream (powdered sugar, butter, milk, flavoring), which usually I don't like too much because it's sickeningly sweet, but this recipe is actually great and not too sweet thanks to the unsweetened chocolate that you melt down and put into the recipe. It has a really great flavor and nice amount of sweetness. Now I've talked too long...on to the recipe!

(You could use better quality chocolate if you wish...but regular old Baker's chocolate works fine for me)

Yellow Cupcakes
(Originally called Supermarket Yellow Cake for Strawberry Shortcake and adapted from A Passion for Baking by Marcy Goldman)
Makes 12 cupcakes

Ingredients
  • 1/2 cup unsalted butter, softened
  • 1 cup sugar, finely pulverized (I actually didn't do this, and my cupcakes were still great. If you want to follow it though, just whir the sugar in a food processor for 1-2 minutes or you can use caster/superfine sugar, which has already been pulverized)
  • 1 large egg
  • 1 1/2 teaspoons vanilla butter & nut extract (The original called for vanilla...but use vanilla butter & nut, I promise it's delicious!)
  • 1 1/2 cups all-purpose flour
  • 2 teaspoons baking powder
  • 1/4 teaspoon salt
  • 1 cup warm milk (This last time, I accidentally let my milk get hot, but used it anyway...seemed like the cupcakes came out even moister!)
Directions
  1. Preheat oven to 350 degrees F. Line a standard cupcake tin with 12 paper liners.
  2. In a mixer bowl, cream butter and sugar until light and fluffy. Add egg and vanilla butter & nut extract and mix well.
  3. Add flour mixture alternately with the milk, starting and ending with the dry ingredients. Mix just until flour and milk are fully incorporated.
  4. Pour batter evenly into prepared liners. Bake 18-20 minutes, or until a toothpick inserted in the center comes out clean. Cool completely before frosting.
French Silk Frosting (From allrecipes.com)
Makes enough to frost 12 cupcakes

Ingredients
  • 1 1/3 cups confectioners' sugar
  • 1/3 cup (5 1/3 tablespoons) butter, softened (I always use salted for American buttercreams. If you only have unsalted, add a pinch of salt)
  • 1 (1 ounce) square unsweetened chocolate, melted
  • 1/4 teaspoon vanilla extract
  • 1 tablespoon milk
Directions
  1. In a medium bowl, blend confectioners' sugar, butter, melted chocolate, and vanilla on low speed. Increase speed to high. Gradually add milk; beat until smooth and fluffy.

Friday, February 5, 2010

Surprisingly Delicious Light Chocolate Chip Cookies

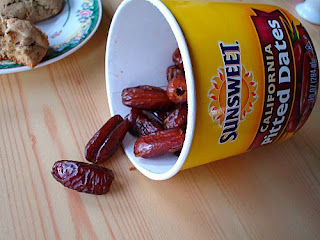
Yes, you heard me right, a delicious light chocolate chip cookie recipe!! Sounds too good to be true, huh? But the good thing is that it is true! I talked about these cookies in my chocolate cake post, and I've just now gotten around to blogging about them, so sorry about that! Anyways, I first came across this recipe on How To Eat a Cupcake, and I was intrigued. The recipe uses dates in it! You reconstitute the dates in water until all the liquid has absorbed and then put it through a strainer to make puree. I had actually never had a date before this recipe, so before attempting it, I made a quick search online to see what they tasted like, and pretty much just got the answer "sweet." And that's really the truth...I can't really discern a flavor except for sweet, so it was perfect for this recipe!

This cookie is wonderfully chewy inside thanks to the dates, and has a nice crispy outside. I have to admit, this was the second time around I made the recipe and I actually attempted to make it even healthier by upping the amount of dates, reducing the sugar slightly, and adding only an egg white instead of a whole egg. All in all, it didn't really change the stats of the cookies too much, and I don't think I liked the flavor as well as the recipe made to a T. So I definitely suggest making the recipe as it's written first, and then if you want to play around with it a second time, you can. The recipe when made as written produces a very crumbly dough that can be slightly hard to work with, but it is worth it! This second time around, my dough actually came together since I messed around with the recipe, so I don't have pictures of the crumbly dough. To see pictures on that, you can visit Cassie's post on How To Eat a Cupcake. Now on to the recipe!

Light Chocolate Chip Cookies (Originally from The America's Test Kitchen Family Baking Book)
Makes about 18 cookies

Ingredients
  • 1 cup water
  • 1/4 cup finely chopped dried dates
  • 3 tablespoons unsalted butter
  • 2 cups all-purpose flour
  • 1/2 teaspoon baking soda
  • 1/2 teaspoon salt
  • 1 1/4 cups packed light brown sugar
  • 1 large egg
  • 2 teaspoon vanilla extract
  • 1/2 cup semisweet chocolate chips
Directions
  1. Adjust an oven rack to the middle position and heat the oven to 325 degrees F. Line two large baking sheets with parchment paper.
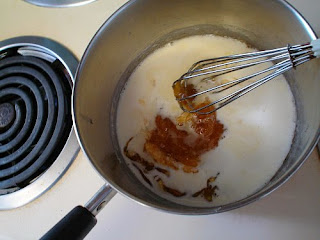
  2. Bring the water and dates to a boil in a small saucepan over medium high heat. Simmer until the dates are tender and most of the water is absorbed, about 20 minutes. Using a rubber spatula, work the dates through a fine mesh strainer into a medium bowl. You should have about a 1/4 of a cup of puree. Then cook the butter in a small saucepan over medium heat until nutty brown, about 4 minutes. Let cool.
  3. Whisk the flour, baking soda, and salt together in a medium bowl. In a large bowl, beat the melted butter, brown sugar, and date puree with an electric mixer on medium speed until smooth, 1 to 2 minutes. Beat in the egg and vanilla until combined, about 3o seconds, scraping down the bowl and beaters as needed.
  4. Reduce the mixer speed to low and slowly add the flour mixture until combined. Reserve 2 tablespoons of the chocolate chips, then mix in the remaining chips until incorporated (as I said, the batter will be really stiff and crumbly, so you can use your hands to bring it together).
  5. (I strongly suggest refrigerating the dough for a couple hours or overnight before baking). Working with 2 tablespoons of dough at a time, roll the dough into balls, tear the balls in half, then press back together with the torn side up (I'm really not sure what the purpose of this is. All it did for me was make it so my cookies turned out ugly, so I just rolled them into balls and baked them just like that...the cookies, or at least my cookies, hold their shape in the oven). Lay the cookies jagged side up on the prepared baking sheets, spaced about 2 inches apart. Press the remaining two tablespoons of chocolate chips evenly over the cookies.
  6. Bake the cookies, one sheet at a time, until the edges are set and beginning to brown but the centers are still soft and puffy, 15 to 20 minutes, rotating the sheet halfway through baking.
  7. Let the cookies cool on the baking sheet for 10 minutes, then serve warm or transfer to cooling rack to cool completely. (I strongly suggest that if there's leftover cookies, to store them in an airtight container with a piece of bread. The cookies when left to sit out get really hard on the outside [though the insides do stay chewy], so putting them in an airtight container with a piece of bread will keep them soft.)