Showing posts with label Daring Bakers. Show all posts

Saturday, October 30, 2010

Daring Bakers October 2010: Doughnuts

Apologies for having to post another Daring Bakers challenge late. It seems like these past few months have been just work, school, work, school for me. Anyways, I was super excited when I found out what the DB challenge for this month would be. I've always wanted to try my hand at doughnuts, and now I got the chance. Although...alas, I must admit something. I have been terrified of working with yeast. Notice how nothing I've made before contains yeast in it? I've always been so afraid that I would kill the yeast, not let the dough rise enough, etc, etc. Plus, it takes a very long time. It's so much simpler to just whip together a batter or dough in 10 minutes than make a dough, let it rise for an hour, punch it down, shape it into whatever you're making, let it rise again, and...oy! But I thought it was about time to face my fears, so although we were given the choice to make either yeast or cake doughnuts, I went with the yeast.

Another reason I pretty much had to go with the yeast is that I wanted to bake my doughnuts. Not that I don't love an amazingly crispy, greasy fried doughnut, I most certainly do. In fact, I would have preferred to make them that way, although I just didn't want to waste all the oil. My family does have oil specifically for frying things, however, the only things that have been fried in it are savory things. We use it to make tempura shrimp, fish, or even chicken, so nothing sweet has ever been fried in it and I was afraid it would affect the taste of my doughnuts. Plus, here's another confession. I've never fried anything! So again, being as I'm totally inexperienced in frying, I decided just to go with baking.
So...how did the process go? In all actuality, without a hitch! My first baking experience with yeast was a complete success. I measured the temperature of the milk carefully so as not to kill the yeast, and after about five minutes, my yeast was happily bubbling and expanding away. I added the rest of the ingredients, kneaded the dough, placed it in a bowl, and sure enough, after an hour it had doubled and looked just like it was supposed to. I cut out the doughnuts, let them rise again, and baked them and they turned out nice and light and fluffy. I originally was going to use two glazes to frost them, a chocolate and a strawberry, but the recipe ended up making less doughnuts than I thought it would, so I just stuck with a my favorite chocolate glaze recipe. While I'm sad I didn't get to make a strawberry glazed, I am happy that it didn't make too many doughnuts, since we just don't need that many in the house! So I glazed them, and topped a few with toffee bits, one with sprinkles, and left the rest plain. And oh, for the doughnut holes, I rolled them around in some melted butter and then covered them in cinnamon sugar. Very tasty! The only thing I was slightly disappointed about was that the dough itself tasted a little bland. It called for some nutmeg, but I usually find nutmeg too strong, so I omitted it. I was going to substitute cinnamon, but didn't, and ended up wishing I had. But other than that, they were very good and definitely worth trying again! Maybe next time I'll get to fry them. ;)

Baked Doughnuts (from Piece of Cake)
I got 5 large doughnuts, plus 5 doughnut holes of course, plus a tiny bit of extra dough.

Ingredients
  • 1/2 cup plus 3 tablespoons warm milk, divided, 95 to 105 degrees (make sure to take its temperature, as the yeast will be killed if its too warm)
  • 1 1/8 teaspoons active dry yeast
  • 1 tablespoons butter, melted and still warm
  • 1/3 cup sugar
  • 1 egg
  • 2 1/2 cups all-purpose flour
  • 1/8 teaspoon freshly grated nutmeg (I omitted, but as I've mentioned, I would advise against that...if you don't like nutmeg, substitute with something else.)
  • 1/2 teaspoon fine grain sea salt
Directions
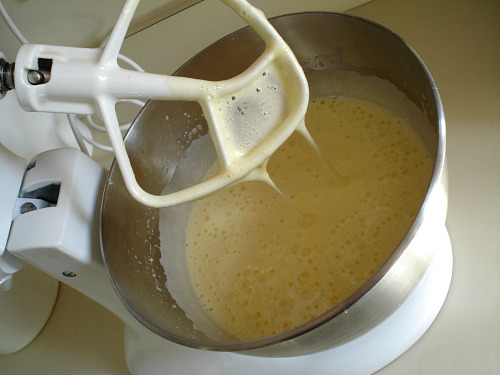
  1. Place 3 tablespoons of the warm milk in the bowl of an electric mixer fitted with the paddle attachment. Stir in the yeast and set aside for at least five minutes. Place the remaining 1/2 cup of warm milk in a small bowl, stir in the butter and sugar, and add it to the yeast mixture. On low speed, stir in the egg, flour, nutmeg, and salt - just until the flour is incorporated. Switch to the dough hook and knead the dough for a few minutes at medium speed. At this point, make a few adjustments - if your dough is seriously sticky, add flour a few tablespoons at a time. Too dry? Add a little bit of milk. Eventually, you want the dough to pull away from the sides of the mixing bowl and become soft and smooth. Turn out the dough onto a floured work surface, knead it a few times by hand, and shape it into a smooth ball.
  2. Transfer the dough to an oiled bowl, cover with plastic wrap and put it in a warm place. Let the dough rise until its doubled in size, about 1 hour.
  3. Punch down the dough and roll it out 1/2-inch thick on a floured work surface. Using a 2-3 inch cookie cutter, stamp out circles. Transfer the circles to a parchment-lined baking sheet and cut holes in the centers with a smaller cutter, about half the diameter of the first--remember the hole will close up on the second rising if it's too small, so make it a little bigger than what a finished doughnuts would look like. (I actually just used two cups, since I don't own any round cookie cutters.) Cover the baking sheet with a clean cloth and let the doughnuts rise for another 45 minutes.
  4. Bake in a 375 degree oven until the bottoms are just golden, 8 to 10 minutes - start checking around 8. Better to underbake then overbake here--pull them early if in doubt. Remove the doughnuts from the oven and let cool for just a minute or two. Dip each one in your favorite glaze or dip in melted butter and coat with sugar. Serve immediately.
Chocolate Glaze (from Food.com)
Makes enough to glaze 5 large doughnuts plus have a little left over.

Ingredients
  • 3 tablespoons butter
  • 2 tablespoons unsweetened cocoa powder
  • 2 tablespoons milk
  • 1 to 1 1/4 cups sifted confectioners' sugar
Directions
  1. Melt the butter in a small saucepan over low heat, about 2 minutes. Stir in the cocoa powder and milk. Cook the glaze, stirring, until it thickens and comes to a boil, about 2 minutes.
  2. Remove the pan from the heat and stir in 2 cups of confectioners' sugar, adding more if needed to make the mixture smooth and a little thicker than pancake syrup; don't let the glaze get too thick.
  3. Pour into a bowl and dip the still warm doughnuts in the glaze. Top with sprinkles or toffee bits or whatever you wish. Serve immediately.
The October 2010 Daring Bakers challenge was hosted by Lori of Butter Me Up. Lori chose to challenge DBers to make doughnuts. She used several sources for her recipes including Alton Brown, Nancy Silverton, Kate Neumann and Epicurious.

Monday, September 27, 2010

Daring Bakers September 2010: Decorated Sugar Cookies

Oh my! I actually almost forgot about this post! Luckily I remembered early on in the day, otherwise I might not have been able to get this post up on time. Phew...anyway, time for another round of the challenges presented by the Daring Bakers! This month I was super excited when I found out what we'd be doing. It was almost as if Mandy from What the Fruitcake?! was reading my mind! I had been looking at intricate, decorated sugar cookies using royal icing on other blogs and had really been wanting to try it out myself, and then boom. I look at the Daring Baker challenge for September, and that's exactly what it is! For those who don't know, royal icing is a type of icing made from egg whites, powdered sugar, and then sometimes lemon or lime juice. It dries hard and shiny and creates the perfect finish for professional-looking decorated sugar cookies. You generally pipe fine lines using a small round piping tip to outline the shape you've created and then use a technique called "flooding" where you water down the royal icing and then use it to fill in the cookie where you've outlined. Then you go back after it's dried with the small piping tip and pipe on details. You can make it as intricate or simple as you like, but the finish product always is impressive.
For the challenge this month, Mandy wanted us to make cookies that were September-themed. She said we could do anything that September meant to us. To me, September means my birthday and the start of fall, my favorite season. The problem is, I only have winter/Christmas themed cookie cutters. So instead of going out and buying more or even making my own, I just free handed them with a knife. It actually wasn't too hard, and of course, if you don't like the shape you've cut, you can always roll it back out and try again. For my birthday, I made birthday cakes, a party hat, and circles with the number 20, the age I turned this month. (Admittedly, I just used a round glass to cut out the circles...no way can I free hand circles that well!) For the fall, I made pumpkins and red/orange/yellow leaves. I actually ended up pretty proud of my cookies. They're not as pretty as other decorated cookies I've seen, but they were pretty good for my first try. I definitely look forward to trying out more in the future! I encourage you to try making some...it's fun, and they taste good too!

Basic Sugar Cookies (adapted from Peggy Porschen)
Makes approximately 36 4" cookies

Ingredients
  • 14 tablespoons unsalted butter, at room temperature
  • 3 cups plus 3 tablespoons all-purpose flour
  • 1 cup caster/superfine sugar
  • 1 large egg, lightly beaten
  • 1 teaspoon vanilla extract
Directions
  1. Cream together the butter, sugar and any flavorings you’re using. Beat until just becoming creamy in texture. (Don’t over mix otherwise you’ll incorporate too much air and the cookies will spread during baking, losing their shape.)
  2. Beat in the egg until well combined, make sure to scrape down the sides of the bowl. Add the sifted flour and mix on low until a non-sticky dough forms.
  3. Knead into a ball and divide into 2 or 3 pieces. Roll out each portion between parchment paper to a thickness of about 1/5 inch. Refrigerate for a minimum of 30 minutes.
  4. Once chilled, peel off parchment and place dough on a lightly floured surface. Cut out shapes with cookie cutters or a sharp knife. Arrange shapes on parchment lined baking sheets and refrigerate for another 30 minutes to an hour. (It's very important to chill the cut-out shapes before baking so they do not lose their shape and spread in the oven.)
  5. Preheat oven to 350°F. Bake until golden around the edges, about 8-15 minutes depending on the size of the cookies. Leave to cool on cooling racks. Once completely cooled, decorate as desired.
Royal Icing (adapted from the Joy of Baking)

Ingredients
  • 2 1/2 to 3 cups confectioner's sugar
  • 2 large egg whites
  • 2 teaspoons lemon juice
  • 1 teaspoon almond extract, optional
Directions
  1. Beat egg whites with lemon juice until combined. Sift the icing sugar to remove lumps and add it to the egg whites. Beat on low until combined and smooth. Add almond extract, if using, and mix until combined. Use immediately or keep in an airtight container.
For decorating tips and all that jazz, please check the printable pdf of this month's challenge here: The Daring Bakers September 2010 challenge.
The September 2010 Daring Bakers’ challenge was hosted by Mandy of “What the Fruitcake?!” Mandy challenged everyone to make Decorated Sugar Cookies based on recipes from Peggy Porschen and The Joy of Baking.

Sunday, August 29, 2010

Daring Bakers August 2010: Ice Cream Petit Fours

So, I'm posting late this month for the Daring Bakers Challenge. Sorry about that! As I mentioned in the MBCC post, I've been quite busy with school and work here recently, so I haven't had as much time to bake as I usually do. From here on out, I would say to expect less posts, and also less pictures. Believe it or not, it actually takes quite a while to write up one of these posts and to post as many pictures as I do, and I just can't do it anymore. I won't be gone completely, of course, but as I said, just expect less posts and photos. Anyways, on to this month's DB challenge! When I first found out what we'd be making, I have to admit...I was a little disappointed. Ice cream again? I mentioned last DB challenge that I didn't have an ice cream maker, and so I just have to settle with putting the base in the freezer and mixing it until it freezes. And that still is the case.

The ice cream tastes good, but because I don't have a machine churning the ice cream and breaking up the ice crystals for me, the ice crystals remain rather large, so the ice cream's just not as smooth and creamy as it should be. So that was a little disappointing. However, this was the first time making petit fours for me, so I was still looking forward to it and the brown butter pound cake sounded absolutely heavenly. The challenge this month actually included a baked alaska as well, however, we could do both or just choose one, and so I chose the petit fours. As expected, the brown butter pound cake was indeed heavenly! And with 19 tablespoons of butter (brown, amazingly nutty and caramely butter!) in it, I should certainly think so! It was a snap to put together and the pieces of cake I sneakily ate when I was leveling it were absolutely delicious. I could have stopped right there and been thoroughly happy with the challenge this month. However, I proceeded onward to cut the cake in half, add the ice cream and then eventually the chocolate glaze.
As you can see, I took a much easier way out on the chocolate glaze. I covered one of the petit fours completely in chocolate and it took a surprisingly long time! With 24 more petit fours to cover, I thought that there had to be an easier way! And so I thought I'd just put some chocolate on the top and let it drip over the sides in an icicle like way and it'd still be efficient and pretty. So overall...the end product was...good. However, the freezer kind of dried out the cake a little bit, which was the best part of the petit four (though that was probably my fault for not covering the entire cake in chocolate). And they're a little hard to eat. The chocolate on top gets very hard in the freezer which is hard to bite through and overpowers the rest of the flavors a little bit. And if you hit the ice cream wrong when you're biting through it, it gives you the chills! All in all, I'm left a little disappointed this month... However, I most definitely WILL be making the brown butter pound cake again, and this time just enjoying it plain, because it was simply out of this world!

Ice Cream Petit Fours
Makes 25 petit fours

For the brown sugar ice cream: (From Dishing Up Delights)
  • 1 1/2 cups heavy whipping cream
  • 1 1/2 cups whole milk (I used 2%)
  • 3/4 cup (packed) dark brown sugar, divided (I used light since that was all I had, but definitely use dark if you have it...it'll add better flavor)
  • 1/2 vanilla bean, split lengthwise
  • 6 large egg yolks
Directions
  1. Combine heavy whipping cream, whole milk, and 1/2 cup sugar in heavy large saucepan. Scrape in seeds from vanilla bean; add bean. Bring cream mixture to simmer over medium heat, stirring until sugar dissolves.
  2. Meanwhile, whisk yolks and remaining 1/4 cup sugar in large bowl until very thick, about 2 minutes.
  3. Gradually whisk hot cream mixture into yolk mixture. Return mixture to saucepan. Stir over medium heat until custard thickens and thermometer inserted into custard registers 180°F, about 3 minutes (do not boil). Strain custard into large bowl set over another bowl of ice and water. Cool custard completely, stirring often, about 15 minutes. Cover and chill overnight.
  4. Process custard in ice cream maker according to manufacturer's instructions. Transfer ice cream to container. Cover and freeze until firm, at least 6 hours and up to 1 day. (If you don't have an ice cream maker like myself, follow David Lebovitz's instructions here.)
For the brown butter pound cake: (adapted from Gourmet October 2009)
  • 19 tablespoons unsalted (sweet) butter
  • 2 cups sifted cake flour (not self-rising; sift before measuring)
  • 1 teaspoon baking powder
  • 1/2 teaspoon salt
  • 1/2 cup packed light brown sugar
  • 1/3 cup granulated sugar
  • 4 large eggs
  • 1/2 teaspoon pure vanilla extract
Directions
  1. Preheat the oven to 325°F and put a rack in the center. Butter and flour a 9”x9” square pan.
  2. Place the butter in a 10” skillet over medium heat. Brown the butter until the milk solids are a dark chocolate brown and the butter smells nutty. (Don’t take your eyes off the butter in case it burns.) Pour into a shallow bowl and chill in the freezer until just congealed, 15-30 minutes.
  3. Whisk together cake flour, baking powder, and salt.
  4. Beat the brown butter, light brown sugar, and granulated sugar in an electric mixer until light and fluffy, about 2 minutes. Beat in the eggs one at a time, mixing well, and then the vanilla extract.
  5. Stir in the flour mixture at low speed until just combined.
  6. Scrape the batter into the greased and floured 9”x9 square pan. Smooth the top with a rubber spatula and rap the pan on the counter. Bake until golden brown on top and when a toothpick inserted into the center comes out clean, about 25 minutes.
  7. Cool in the pan 10 minutes. Run a knife along the edge and invert right-side-up onto a cooling rack to cool completely.
For the hard chocolate glaze: (from allrecipes)
  • 1/2 cup unsalted butter
  • 10 (1 ounce) squares semisweet chocolate
Directions
  1. Chop the chocolate into small pieces. Combine chocolate with butter in the top of a double boiler, over simmering water. Stir frequently until melted and smooth. Remove from heat. Cool to tepid before glazing the petit fours.
Assembly:
  1. Line a 9”x9” pan with plastic wrap, so that no sides of the pan are exposed and so there is some extra plastic wrap hanging off the sides. Spread 1 ¾ to 2 cups ice cream into the pan. Cover with more plastic wrap and freeze several hours.
  2. Once the brown butter pound cake has completely cooled, level the top with a cake leveler or a serrated knife. Then split the cake in half horizontally to form two thin layers.
  3. Unwrap the frozen ice cream. Flip out onto one of the layers of cake and top with the second layer of cake. Wrap well in plastic wrap and return to the freezer overnight.
  4. Trim ¾” off each side of the ice cream cake to leave a perfectly square 7.5” ice cream cake. Cut the cake into twenty five petit fours, each 1.5”x1.5”.
  5. Glaze the petit fours one at a time: place a petit four on a fork and spoon chocolate glaze over it. (Or be lazy like me and just let the chocolate drip over the sides.)
  6. Place the petit fours on a parchment-lined baking sheet and return to the freezer for one hour.
The August 2010 Daring Bakers’ challenge was hosted by Elissa of 17 and Baking. For the first time, The Daring Bakers partnered with Sugar High Fridays for a co-event and Elissa was the gracious hostess of both. Using the theme of beurre noisette, or browned butter, Elissa chose to challenge Daring Bakers to make a pound cake to be used in either a Baked Alaska or in Ice Cream Petit Fours. The sources for Elissa’s challenge were Gourmet magazine and David Lebovitz’s “The Perfect Scoop”.

Tuesday, July 27, 2010

Daring Bakers July 2010: Swiss Roll Ice Cream Cake

In my infinite knowledge (har har), I accidentally almost posted this yesterday! That wouldn't have been good, ha ha. I think I was just a bit frazzled. A huge storm came through my area on Sunday and knocked out my power, and my power didn't come back on until yesterday, 23 hours later! It was a rough bit, and I'm very glad that I made this ice cream cake a couple weeks ago, otherwise it most likely would have melted. Anyways, now that my confusion has been cleared up and I am indeed posting on the correct day, it's time to tell you about this month's Daring Bakers challenge. This is only my third DB challenge, but it was probably one that I was most excited for. I was a little worried at first, because I don't have an ice cream maker (though really want one), but I read that the poster of the recipe had made this recipe without one, so I was quite relieved. Like last time, all of the parts were very easy to put together, but this time, luckily nothing went astray!
This was the first time I've ever made a rolled cake. I was definitely a bit nervous. I still couldn't see how I could roll the cake without it breaking in two. But when the cakes came out of the oven, I certainly saw how! They were very spongy and pliable, and rolled up just fine. However, when they were cooled and I unrolled them to spread them with cream, surely enough, they were quite raggedy and slightly coming apart. Aha, but I said nothing really went astray, right? That's right. When I rolled the cakes back up with the cream, they certainly didn't look very pretty, but when I sliced into them and lined the bowl with them, they looked perfectly fine and nice (well, they could have been nicer, but not too bad for a first-timer). Woohoo! After that, everything went pretty quick and easy. Well, I say quick, but I mean putting them together. There was a lot of down time while making this, though. I assume if you had an ice cream maker, it would probably go a heck of a lot faster for you. Because I didn't have one, I used a method where I just put the ice cream bases in the freezer and as it froze, I took it out every once and a while and beat it with a wooden spoon. Though I have to admit I got a little slack...the ice cream took several hours to freeze totally! But I was happy to do it. Oh, and the hot fudge sauce? Probably the easiest, and very yummy!
So how did it taste? Very, very good! This is probably the most satisfied I've been with a DB challenge so far. In terms of taste, I think maybe the croquembouche was my favorite by just a slight hair, but the Swiss roll ice cream cake was delicious and much better looking than my croquembouche, so it wins for now. My only complaint would be that my favorite part of the cake was the one thing that there seemed to be the least amount of: the chocolate ice cream. Of course, Sunita, the daring baker who provided the challenge, did give us free reign on ice cream flavors, so I guess I'm to blame for that one. So I encourage you to give this recipe a try and don't be afraid to change up some of the flavors. There is lots of downtime, but it's certainly worth it in the end!

Swiss Roll Ice Cream Cake (inspired by the Swiss roll ice cream cake from Taste of Home; recipes developed by Sunita of Sunita’s world – life and food)
Makes 1 large cake

For the swiss rolls:
  • 6 medium sized eggs
  • 1 cup caster sugar
  • 6 tablespoons all-purpose flour
  • 5 tablespoons cocoa powder
  • 2 tablespoons boiling water
  • extra caster sugar or powdered sugar for rolling
  • oil for brushing the pans
For the cream filling:
  • 2 cups heavy whipping cream
  • 1 vanilla bean, cut into small pieces (or 1 teaspoon vanilla extract)
  • 5 tablespoons caster sugar
Directions
  1. For the cake: Preheat the oven to 400 degrees F. Brush two 9x11 inch baking pans with a little oil and line with greaseproof baking paper (okay, I looked and looked for 9x11 inch pans, but I'm just not sure if they sell them in the US, so I baked mine in an 8x11, which was the closest I could find). If you have just one pan, bake one cake and then let the pan cool completely before using it for the next cake.
  2. In a large mixing bowl, add the eggs and sugar and beat till very thick; when the beaters are lifted, it should leave a trail on the surface for at least 10 seconds.
  3. Add the flour mixture, in three batches and fold in gently with a spatula. Fold in the water.
  4. Divide the mixture among the two baking pans and spread it out evenly, into the corners of the pans. Place a pan in the center of the preheated oven and bake for about 10-12 minutes or till the center is springy to the touch.
  5. Spread a kitchen towel on the counter and sprinkle a little caster sugar (or powdered sugar) over it. Turn the cake on to the towel and peel away the baking paper. Trim any crisp edges. Starting from one of the shorter sides, start to make a roll with the towel going inside. Cool the wrapped roll on a rack, seam side down. Repeat for the next cake as well.
  6. For the cream filling: Grind together the vanilla pieces and sugar in a food processer till nicely mixed together. If you are using vanilla extract, just grind the sugar on its own and then add the sugar and extract to the cream.
  7. In a large bowl, add the cream and vanilla-sugar mixture and beat till very thick. Divide the cream mixture between the completely cooled cakes.
  8. Open the rolls and spread the cream mixture, making sure it does not go right to the edges (a border of ½ an inch should be fine). Roll the cakes up again, this time without the towel. Wrap in plastic wrap and chill in the fridge till needed, seam side down.
For the vanilla ice cream:
  • 2 1/2 cups heavy whipping cream
  • 1 vanilla bean, cut into piece or 1 teaspoon vanilla extract
  • 1/2 cup granulated sugar
Directions
  1. Grind together the sugar and vanilla in a food processor. In a mixing bowl, add the cream and vanilla sugar mixture and whisk lightly till everything is mixed together. If you are using the vanilla extract, grind the sugar on its own and then and the sugar along with the vanilla extract to the cream.
  2. Pour into a freezer friendly container and freeze till firm around the edges. Remove from the freezer, beat till smooth and return to the freezer. Do this 3-4 times and then set completely.
For the hot fudge sauce:
  • 1 cup caster sugar
  • 3 tablespoons cocoa powder
  • 2 tablespoons cornstarch
  • 1 1/2 cups water
  • 1 tablespoon butter
  • 1 teaspoon vanilla extract
Directions
  1. In a small saucepan, whisk together the sugar, cocoa powder, cornstarch and water.
  2. Place the pan over heat, and stir constantly, till it begins to thicken and is smooth (for about 2 minutes).
  3. Remove from heat and mix in the butter and vanilla. Keep aside to cool.
For the chocolate ice cream:
  • 2 cups heavy whipping cream
  • 1 cup caster sugar
  • 3 tablespoons cocoa powder
Directions
  1. Grind together the sugar and the cocoa powder in a food processor.
  2. In a saucepan, add all the ingredients and whisk lightly. Place the pan over heat and keep stirring till it begins to bubble around the edges.
  3. Remove from heat and cool completely before transferring to a freezer friendly container till firm around the edges. If you are using an ice cream maker, churn the ice cream according to the manufacturer’s instruction, after the mixture has cooled completely.
  4. Remove from the freezer, beat till smooth and return to the freezer. Do this 3-4 times and then set completely.
Assembly:
  1. Cut the Swiss rolls into about 20 equal slices (approximately 1 inch each).
  2. Cover the bottom and sides of the bowl in which you are going to set the dessert with cling film/plastic wrap. (I used my 4.5 quart Kitchen Aid bowl...it's about 8 1/2 inches in diameter and 6 1/2 inches deep.)
  3. Arrange two slices at the bottom of the pan, with their seam sides facing each other. Arrange the Swiss roll slices up the bowl, with the seam sides facing away from the bottom, to cover the sides of the bowl. Cover the bowl with plastic wrap and freeze till the slices are firm (at least 30 minutes).
  4. Soften the vanilla ice cream. Take the bowl out of the freezer, remove the cling film cover and add the ice cream on top of the cake slices. Spread it out to cover the bottom and sides of the bowl. Cover the bowl with plastic wrap and freeze till firm (at least 1 hour).
  5. Add the fudge sauce over the vanilla ice cream, cover and freeze till firm (at least an hour).
  6. Soften the chocolate ice cream and spread it over the fudge sauce. Cover with plastic wrap and freeze for at least 4-5 hours till completely set .
  7. Remove the plastic cover, and place the serving plate on top of the bowl. Turn it upside down and remove the bowl and the plastic lining. If the bowl does not come away easily, wipe the outsides of the bowl with a kitchen towel dampened with hot water. The bowl will come away easily.
  8. Keep the cake out of the freezer for at least 10 minutes before slicing, depending on how hot your region is. Slice with a sharp knife, dipped in hot water.
The July 2010 Daring Bakers’ challenge was hosted by Sunita of Sunita’s world – life and food. Sunita challenged everyone to make an ice-cream filled Swiss roll that’s then used to make a bombe with hot fudge. Her recipe is based on an ice cream cake recipe from Taste of Home.-

Sunday, June 27, 2010

Daring Bakers June 2010: Pavlova

Hello, everyone! I'm back from vacation and it's now time to post my second ever Daring Bakers challenge. (And please excuse the really long post...I've got a lot to talk about with this recipe!) I was really excited when I found out what we'd be making. I mean, chocolate pavlova? Chocolate mascarpone mousse? Yum! Bring it on! Pavlova is extremely similar to a meringue, made by whipping egg whites with things such as sugar and cornstarch (in this instance, confectioners' sugar, which has cornstarch in it) and then either piping it or spreading it onto a baking sheet and slow baking, resulting in a crispy exterior and marshmallowy center. It's traditionally just a vanilla meringue and is topped with whipped cream and fruit, but we Daring Bakers got super fancy, and made our pavlovas chocolate, topped with a chocolate mascarpone mousse and a crème anglaise sauce. Crème anglaise is French for English cream, and is basically a custard sauce made for pouring on desserts. It uses the same basic ingredients as custard or pudding does, except there's no cornstarch added, so it stays a sauce instead of becoming thick. I thought I had a clear picture of what I would like best and what I was least looking forward to...but to my surprise, it turned out quite different.
I was very excited to use the mascarpone. I've been wanting to try this cheese for a while now being as people have compared it to cream cheese, but said that it was much better. I'm not too much a fan of cream cheese, so I thought I might really like this one. The cheese was alright...but it basically just tasted like heavy cream. I don't know why I expected a kind of sweetness to it, but I should have known better, especially being as I've looked over this recipe for mascarpone that the Daring Bakers made for tiramisu before I was a member. The only ingredients in it are heavy cream and lemon juice. However, it would make a great base for American buttercreams, I think. If I ever decide to use mascarpone in the future, I'll definitely make it myself, because it was a bit pricy to buy already made. Anyway, the process of making everything was crazy simple. Each recipe went by so easily that I was quite surprised. The meringue for the pavlova? Easy peasy. The mousse? Piece of cake. The crème anglaise? Nothin' to it. Although there was quite a bit of down time for each process, everything went by so perfectly. In fact, too perfectly. I should have known that, with everything going by so smoothly, something bad was bound to happen.

Well, I expected to like the mousse the most, the pavlovas second best, and I actually didn't expect to like the crème anglaise. However, it was the exact opposite. I don't know what happened to my mousse, but something definitely went wrong. I folded in the mascarpone cream and the mousse was beautiful and smooth and creamy. However, I set it off to the side and did something for a small moment, and when I came back, I noticed it was starting to get weirdly thick. I tried to think nothing of it, and put it in the fridge until the pavlova was ready hoping that it would be okay. Needless to say, it wasn't. It was extremely thick and had a weird texture, one that I would liken to ricotta cheese. I definitely couldn't pipe it, so I just kind of had to lob it on to my pavlova as prettily as possible. The taste was just okay...but I think it was too dark and not sugary enough for my tastes. The longer it set in the fridge, the thicker and more weird-textured it became...I had to throw almost all of it out. I was SO disappointed, especially being as I used pricy ingredients in it (the same chocolate I was talking about last post). It was most likely my fault, but I'll probably never try this mousse again. The pavlovas were good, however, I baked them too long. They were crunchy all the way through instead of marshmallowy in the center. But they did taste good, so I would make this recipe again, just not bake it as long. And the crème anglaise? I actually loved it! It was the only recipe that went by without a hitch, and it was really, really delicious. I would definitely make it again, and really, it didn't even need the mascarpone or cream stirred in! It was perfect as is! Anyway, I'd encourage you to try this recipe anyway. Hopefully yours will go by better than mine did. :)

Chocolate Pavlova with Chocolate Mascarpone Mousse and Mascarpone Crème Anglaise (from Chocolate Epiphany by Francois Payard)
Makes about 8 small pavlovas or 1 large pavlova

For the crème anglaise:

  • 1 cup (235 ml) whole milk (I used 2% and it was fine)
  • 1 cup (235 ml) heavy cream
  • 1 vanilla bean, split or 1 teaspoon pure vanilla extract
  • 6 large egg yolks
  • 6 tablespoons (75 grams) sugar
Directions
  1. In a bowl, whisk together the egg yolks and sugar until the mixture turns pale yellow. (I did this in my stand mixer.)
  2. Combine the milk, cream and vanilla in a saucepan over medium high heat, bringing the mixture to a boil. Take off the heat.
  3. Pour about 1/2 cup of the hot liquid into the yolk mixture, whisking constantly to keep from making scrambled eggs. Pour the yolk mixture into the pan with the remaining cream mixture and put the heat back on medium. Stir constantly with a wooden spoon until the mixture thickens enough to lightly coat the back of a wooden spoon. DO NOT OVERCOOK.
  4. Remove the mixture from the heat and strain it through a fine mesh sieve into a bowl. Cover and refrigerate until the mixture is thoroughly chilled, about 2 hours or overnight. (I chilled mine overnight. I suggest doing this too, as it saves time when you're making the rest of the dessert.)
For the chocolate meringue (for the pavlova):
  • 3 large egg whites
  • 1/2 cup plus 1 tablespoon (110 grams) granulated sugar
  • 1/4 cup (30 grams) confectioner’s (icing) sugar
  • 1/3 cup (30 grams) cocoa powder
Directions
  1. Place a rack in the center of the oven and preheat to 200º F (95º C) degrees. Line two baking sheets with silpat or parchment and set aside.
  2. Put the egg whites in a bowl and whip until soft peaks form. Increase speed to high and gradually add granulated sugar about 1 tablespoon at a time until stiff peaks form. (The whites should be firm but moist.)
  3. Sift the confectioner’s sugar and cocoa powder over the egg whites and fold the dry ingredients into the white. (This looks like it will not happen. Fold gently and it will eventually come together.)
  4. Fill a pastry bag with the meringue. Pipe the meringue into whatever shapes you desire. Alternatively, you could just free form your shapes and level them a bit with the back of a spoon.
  5. Bake for 2-3 hours until the meringues become dry and crisp. (If you make thinner pavlovas like me, you may want to take them out a lot sooner. I baked mine for 2 hours, and as I said, mine came out crisp all the way through. Start checking at 1 hour.) Cool and store in an airtight container for up to 3 days.
For the chocolate mascarpone mousse:
  • 1 1/2 cups (355 ml) heavy cream (cream with a milk fat content of between 36 and 40 percent)
  • grated zest of 1 average sized lemon (I omitted)
  • 9 ounces (255 grams) 72% chocolate, chopped
  • 1 2/3 cups (390 ml) mascarpone
  • pinch of nutmeg (I used cinnamon)
  • 2 tablespoons (30 ml) Grand Marnier (I used about a tablespoon of vanilla)
Directions
  1. Put 1/2 cup (120 mls) of the heavy cream and the lemon zest in a saucepan over medium high heat. Once warm, add the chocolate and whisk until melted and smooth. Transfer the mixture to a bowl and let sit at room temperature until cool. (My chocolate didn't completely melt using this method, so I quickly put on a double boiler and melted the rest that way.)
  2. Place the mascarpone, the remaining cup of cream and nutmeg in a bowl. Whip on low for a minute until the mascarpone is loose. Add the Grand Marnier and whip on medium speed until it holds soft peaks. (DO NOT OVERBEAT AS THE MASCARPONE WILL BREAK.)
  3. Mix about 1/4 of the mascarpone mixture into the chocolate to lighten. Fold in the remaining mascarpone until well incorporated. Fill a pastry bag with the mousse. Again, you could just free form mousse on top of the pavlova.
For the mascarpone cream:
  • 1 recipe crème anglaise
  • 1/2 cup (120 ml) mascarpone
  • 2 tablespoons (30 ml) Sambucca (optional) (I omitted)
  • 1/2 cup (120 ml) heavy cream
Directions
  1. Prepare the crème anglaise. Slowly whisk in the mascarpone and the Sambucca and let the mixture cool. Put the cream in a bowl and beat with electric mixer until very soft peaks are formed. Fold the cream into the mascarpone mixture.
To assemble:
  1. Pipe the mousse onto the pavlovas and drizzle with the mascarpone cream over the top. Dust with confectioner’s sugar and fresh fruit if desired.

The June 2010 Daring Bakers’ challenge was hosted by Dawn of Doable and Delicious. Dawn challenged the Daring Bakers’ to make Chocolate Pavlovas and Chocolate Mascarpone Mousse. The challenge recipe is based on a recipe from the book Chocolate Epiphany by Francois Payard.