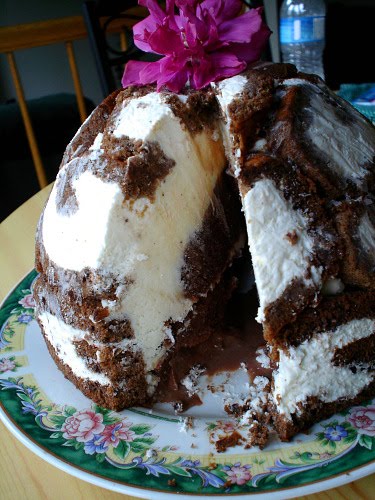
So, I'm posting late this month for the Daring Bakers Challenge. Sorry about that! As I mentioned in the MBCC post, I've been quite busy with school and work here recently, so I haven't had as much time to bake as I usually do. From here on out, I would say to expect less posts, and also less pictures. Believe it or not, it actually takes quite a while to write up one of these posts and to post as many pictures as I do, and I just can't do it anymore. I won't be gone completely, of course, but as I said, just expect less posts and photos. Anyways, on to this month's DB challenge! When I first found out what we'd be making, I have to admit...I was a little disappointed. Ice cream again? I mentioned last DB challenge that I didn't have an ice cream maker, and so I just have to settle with putting the base in the freezer and mixing it until it freezes. And that still is the case.
The ice cream tastes good, but because I don't have a machine churning the ice cream and breaking up the ice crystals for me, the ice crystals remain rather large, so the ice cream's just not as smooth and creamy as it should be. So that was a little disappointing. However, this was the first time making petit fours for me, so I was still looking forward to it and the brown butter pound cake sounded absolutely heavenly. The challenge this month actually included a baked alaska as well, however, we could do both or just choose one, and so I chose the petit fours. As expected, the brown butter pound cake was indeed heavenly! And with 19 tablespoons of butter (brown, amazingly nutty and caramely butter!) in it, I should certainly think so! It was a snap to put together and the pieces of cake I sneakily ate when I was leveling it were absolutely delicious. I could have stopped right there and been thoroughly happy with the challenge this month. However, I proceeded onward to cut the cake in half, add the ice cream and then eventually the chocolate glaze.
 As you can see, I took a much easier way out on the chocolate glaze. I covered one of the petit fours completely in chocolate and it took a surprisingly long time! With 24 more petit fours to cover, I thought that there had to be an easier way! And so I thought I'd just put some chocolate on the top and let it drip over the sides in an icicle like way and it'd still be efficient and pretty. So overall...the end product was...good. However, the freezer kind of dried out the cake a little bit, which was the best part of the petit four (though that was probably my fault for not covering the entire cake in chocolate). And they're a little hard to eat. The chocolate on top gets very hard in the freezer which is hard to bite through and overpowers the rest of the flavors a little bit. And if you hit the ice cream wrong when you're biting through it, it gives you the chills! All in all, I'm left a little disappointed this month... However, I most definitely WILL be making the brown butter pound cake again, and this time just enjoying it plain, because it was simply out of this world!
Ice Cream Petit Fours
Makes 25 petit fours
For the brown sugar ice cream: (From Dishing Up Delights)
- 1 1/2 cups heavy whipping cream
- 1 1/2 cups whole milk (I used 2%)
- 3/4 cup (packed) dark brown sugar, divided (I used light since that was all I had, but definitely use dark if you have it...it'll add better flavor)
- 1/2 vanilla bean, split lengthwise
- 6 large egg yolks
- Combine heavy whipping cream, whole milk, and 1/2 cup sugar in heavy large saucepan. Scrape in seeds from vanilla bean; add bean. Bring cream mixture to simmer over medium heat, stirring until sugar dissolves.
- Meanwhile, whisk yolks and remaining 1/4 cup sugar in large bowl until very thick, about 2 minutes.
- Gradually whisk hot cream mixture into yolk mixture. Return mixture to saucepan. Stir over medium heat until custard thickens and thermometer inserted into custard registers 180°F, about 3 minutes (do not boil). Strain custard into large bowl set over another bowl of ice and water. Cool custard completely, stirring often, about 15 minutes. Cover and chill overnight.
- Process custard in ice cream maker according to manufacturer's instructions. Transfer ice cream to container. Cover and freeze until firm, at least 6 hours and up to 1 day. (If you don't have an ice cream maker like myself, follow David Lebovitz's instructions here.)


- 19 tablespoons unsalted (sweet) butter
- 2 cups sifted cake flour (not self-rising; sift before measuring)
- 1 teaspoon baking powder
- 1/2 teaspoon salt
- 1/2 cup packed light brown sugar
- 1/3 cup granulated sugar
- 4 large eggs
- 1/2 teaspoon pure vanilla extract
- Preheat the oven to 325°F and put a rack in the center. Butter and flour a 9”x9” square pan.
- Place the butter in a 10” skillet over medium heat. Brown the butter until the milk solids are a dark chocolate brown and the butter smells nutty. (Don’t take your eyes off the butter in case it burns.) Pour into a shallow bowl and chill in the freezer until just congealed, 15-30 minutes.
- Whisk together cake flour, baking powder, and salt.
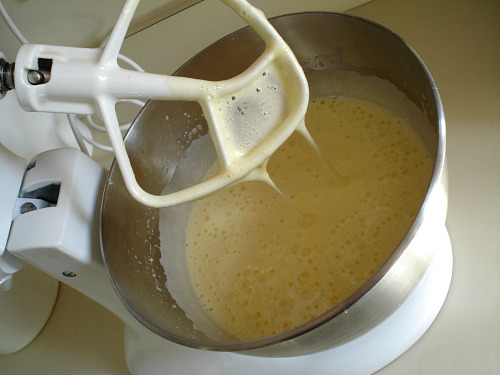
- Beat the brown butter, light brown sugar, and granulated sugar in an electric mixer until light and fluffy, about 2 minutes. Beat in the eggs one at a time, mixing well, and then the vanilla extract.
- Stir in the flour mixture at low speed until just combined.
- Scrape the batter into the greased and floured 9”x9 square pan. Smooth the top with a rubber spatula and rap the pan on the counter. Bake until golden brown on top and when a toothpick inserted into the center comes out clean, about 25 minutes.
- Cool in the pan 10 minutes. Run a knife along the edge and invert right-side-up onto a cooling rack to cool completely.


- 1/2 cup unsalted butter
- 10 (1 ounce) squares semisweet chocolate
- Chop the chocolate into small pieces. Combine chocolate with butter in the top of a double boiler, over simmering water. Stir frequently until melted and smooth. Remove from heat. Cool to tepid before glazing the petit fours.


- Line a 9”x9” pan with plastic wrap, so that no sides of the pan are exposed and so there is some extra plastic wrap hanging off the sides. Spread 1 ¾ to 2 cups ice cream into the pan. Cover with more plastic wrap and freeze several hours.
- Once the brown butter pound cake has completely cooled, level the top with a cake leveler or a serrated knife. Then split the cake in half horizontally to form two thin layers.
- Unwrap the frozen ice cream. Flip out onto one of the layers of cake and top with the second layer of cake. Wrap well in plastic wrap and return to the freezer overnight.
- Trim ¾” off each side of the ice cream cake to leave a perfectly square 7.5” ice cream cake. Cut the cake into twenty five petit fours, each 1.5”x1.5”.
- Glaze the petit fours one at a time: place a petit four on a fork and spoon chocolate glaze over it. (Or be lazy like me and just let the chocolate drip over the sides.)
- Place the petit fours on a parchment-lined baking sheet and return to the freezer for one hour.