Sunday, August 29, 2010

Daring Bakers August 2010: Ice Cream Petit Fours

So, I'm posting late this month for the Daring Bakers Challenge. Sorry about that! As I mentioned in the MBCC post, I've been quite busy with school and work here recently, so I haven't had as much time to bake as I usually do. From here on out, I would say to expect less posts, and also less pictures. Believe it or not, it actually takes quite a while to write up one of these posts and to post as many pictures as I do, and I just can't do it anymore. I won't be gone completely, of course, but as I said, just expect less posts and photos. Anyways, on to this month's DB challenge! When I first found out what we'd be making, I have to admit...I was a little disappointed. Ice cream again? I mentioned last DB challenge that I didn't have an ice cream maker, and so I just have to settle with putting the base in the freezer and mixing it until it freezes. And that still is the case.

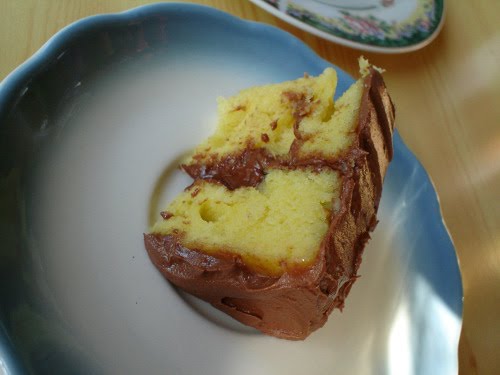
The ice cream tastes good, but because I don't have a machine churning the ice cream and breaking up the ice crystals for me, the ice crystals remain rather large, so the ice cream's just not as smooth and creamy as it should be. So that was a little disappointing. However, this was the first time making petit fours for me, so I was still looking forward to it and the brown butter pound cake sounded absolutely heavenly. The challenge this month actually included a baked alaska as well, however, we could do both or just choose one, and so I chose the petit fours. As expected, the brown butter pound cake was indeed heavenly! And with 19 tablespoons of butter (brown, amazingly nutty and caramely butter!) in it, I should certainly think so! It was a snap to put together and the pieces of cake I sneakily ate when I was leveling it were absolutely delicious. I could have stopped right there and been thoroughly happy with the challenge this month. However, I proceeded onward to cut the cake in half, add the ice cream and then eventually the chocolate glaze.
As you can see, I took a much easier way out on the chocolate glaze. I covered one of the petit fours completely in chocolate and it took a surprisingly long time! With 24 more petit fours to cover, I thought that there had to be an easier way! And so I thought I'd just put some chocolate on the top and let it drip over the sides in an icicle like way and it'd still be efficient and pretty. So overall...the end product was...good. However, the freezer kind of dried out the cake a little bit, which was the best part of the petit four (though that was probably my fault for not covering the entire cake in chocolate). And they're a little hard to eat. The chocolate on top gets very hard in the freezer which is hard to bite through and overpowers the rest of the flavors a little bit. And if you hit the ice cream wrong when you're biting through it, it gives you the chills! All in all, I'm left a little disappointed this month... However, I most definitely WILL be making the brown butter pound cake again, and this time just enjoying it plain, because it was simply out of this world!

Ice Cream Petit Fours
Makes 25 petit fours

For the brown sugar ice cream: (From Dishing Up Delights)
  • 1 1/2 cups heavy whipping cream
  • 1 1/2 cups whole milk (I used 2%)
  • 3/4 cup (packed) dark brown sugar, divided (I used light since that was all I had, but definitely use dark if you have it...it'll add better flavor)
  • 1/2 vanilla bean, split lengthwise
  • 6 large egg yolks
Directions
  1. Combine heavy whipping cream, whole milk, and 1/2 cup sugar in heavy large saucepan. Scrape in seeds from vanilla bean; add bean. Bring cream mixture to simmer over medium heat, stirring until sugar dissolves.
  2. Meanwhile, whisk yolks and remaining 1/4 cup sugar in large bowl until very thick, about 2 minutes.
  3. Gradually whisk hot cream mixture into yolk mixture. Return mixture to saucepan. Stir over medium heat until custard thickens and thermometer inserted into custard registers 180°F, about 3 minutes (do not boil). Strain custard into large bowl set over another bowl of ice and water. Cool custard completely, stirring often, about 15 minutes. Cover and chill overnight.
  4. Process custard in ice cream maker according to manufacturer's instructions. Transfer ice cream to container. Cover and freeze until firm, at least 6 hours and up to 1 day. (If you don't have an ice cream maker like myself, follow David Lebovitz's instructions here.)
For the brown butter pound cake: (adapted from Gourmet October 2009)
  • 19 tablespoons unsalted (sweet) butter
  • 2 cups sifted cake flour (not self-rising; sift before measuring)
  • 1 teaspoon baking powder
  • 1/2 teaspoon salt
  • 1/2 cup packed light brown sugar
  • 1/3 cup granulated sugar
  • 4 large eggs
  • 1/2 teaspoon pure vanilla extract
Directions
  1. Preheat the oven to 325°F and put a rack in the center. Butter and flour a 9”x9” square pan.
  2. Place the butter in a 10” skillet over medium heat. Brown the butter until the milk solids are a dark chocolate brown and the butter smells nutty. (Don’t take your eyes off the butter in case it burns.) Pour into a shallow bowl and chill in the freezer until just congealed, 15-30 minutes.
  3. Whisk together cake flour, baking powder, and salt.
  4. Beat the brown butter, light brown sugar, and granulated sugar in an electric mixer until light and fluffy, about 2 minutes. Beat in the eggs one at a time, mixing well, and then the vanilla extract.
  5. Stir in the flour mixture at low speed until just combined.
  6. Scrape the batter into the greased and floured 9”x9 square pan. Smooth the top with a rubber spatula and rap the pan on the counter. Bake until golden brown on top and when a toothpick inserted into the center comes out clean, about 25 minutes.
  7. Cool in the pan 10 minutes. Run a knife along the edge and invert right-side-up onto a cooling rack to cool completely.
For the hard chocolate glaze: (from allrecipes)
  • 1/2 cup unsalted butter
  • 10 (1 ounce) squares semisweet chocolate
Directions
  1. Chop the chocolate into small pieces. Combine chocolate with butter in the top of a double boiler, over simmering water. Stir frequently until melted and smooth. Remove from heat. Cool to tepid before glazing the petit fours.
Assembly:
  1. Line a 9”x9” pan with plastic wrap, so that no sides of the pan are exposed and so there is some extra plastic wrap hanging off the sides. Spread 1 ¾ to 2 cups ice cream into the pan. Cover with more plastic wrap and freeze several hours.
  2. Once the brown butter pound cake has completely cooled, level the top with a cake leveler or a serrated knife. Then split the cake in half horizontally to form two thin layers.
  3. Unwrap the frozen ice cream. Flip out onto one of the layers of cake and top with the second layer of cake. Wrap well in plastic wrap and return to the freezer overnight.
  4. Trim ¾” off each side of the ice cream cake to leave a perfectly square 7.5” ice cream cake. Cut the cake into twenty five petit fours, each 1.5”x1.5”.
  5. Glaze the petit fours one at a time: place a petit four on a fork and spoon chocolate glaze over it. (Or be lazy like me and just let the chocolate drip over the sides.)
  6. Place the petit fours on a parchment-lined baking sheet and return to the freezer for one hour.
The August 2010 Daring Bakers’ challenge was hosted by Elissa of 17 and Baking. For the first time, The Daring Bakers partnered with Sugar High Fridays for a co-event and Elissa was the gracious hostess of both. Using the theme of beurre noisette, or browned butter, Elissa chose to challenge Daring Bakers to make a pound cake to be used in either a Baked Alaska or in Ice Cream Petit Fours. The sources for Elissa’s challenge were Gourmet magazine and David Lebovitz’s “The Perfect Scoop”.

Wednesday, August 25, 2010

Brown Sugar Banana Bread

It always seems that whenever my family gets bananas at the grocery store, there are always a couple left over that don't get eaten. They just hang there on the banana hook and continue to become more and more ripe. Of course, what better to do with them then than to make a banana bread? I've already shared my favorite banana bread on here before, and although I love that recipe, I thought for once I might change it up and try a different recipe. This one in particular had caught my eye not too long ago on Allrecipes. It doesn't have too many reviews on it so far, but the small amount it has are quite positive. Most reviewers described the bread as having a wonderful flavor and a super soft texture thanks to the brown sugar. The one thing that worried me was that a couple of reviewers had trouble with the bread sinking in the middle the first time they tried it. But most people who had trouble with that had said that the second time they made it, it came out perfect, and provided tips for what they did to make it not sink. So with ripe bananas and tips on hand, I went to make this bread for breakfast.

One really interesting thing about this recipe is that it has very different directions than most quick breads. Generally for quick breads or muffins, you use the "mix, mix, pour, mix" method. As in, you mix together the dry ingredients in one bowl, mix together the wet ingredients in a second, pour the wet ingredients into the dry and mix again until combined. However, the mixing method for this recipe is actually more like a cookie recipe. You beat the brown sugar and butter until fluffy, then add the smashed bananas, egg, cinnamon, vanilla, and milk, and then add the dry ingredients. Using the advice of some of the reviewers, I beat my butter and sugar for quite a while, at least 7-8 minutes until it was incredibly light and fluffy. I also let my egg come up to room temperature, and though I didn't have time to let my milk come to room temperature, I zapped it in the microwave until warm. The result was an incredibly creamy and delicious batter that I had problems not eating straight out of the bowl! The reviewers also suggested that the cooking time wasn't long enough, so I let it go longer than called for until a toothpick came out clean. Sure enough, I ended up with a non-sunken, soft-textured, delicious tasting banana bread. I'm not sure if I like it better than the banana bread recipe I've already posted, but it's certainly on par with it, and definitely a recipe I'll keep and make again!

Brown Sugar Banana Bread
(from allrecipes)
Makes 1 9x5 inch loaf

Ingredients
  • 4 ripe bananas, cut into chunks (I only used 3 medium, since that was all I had)
  • 1 1/4 cups light brown sugar
  • 1/2 cup butter, softened
  • 1 egg
  • 1 teaspoon cinnamon
  • 1 teaspoon vanilla extract
  • 1/4 cup whole milk (I used 2%)
  • 2 cups all-purpose flour
  • 1/2 teaspoon baking soda
  • 1 teaspoon baking powder
  • 1/2 teaspoon kosher salt
Directions
  1. Preheat oven to 350 degrees F (175 degrees C). Grease a 9x5-inch loaf pan.
  2. Place the bananas into a large plastic zipper bag, seal the bag, and smoosh the bananas with your fingers until very well mashed. Set the bananas aside. Place the brown sugar and butter into a mixing bowl, and mix on medium speed with an electric mixer until light and fluffy, 1 to 2 minutes. Cut a corner from the plastic bag, and squeeze the mashed bananas into the bowl of brown sugar mixture. With the electric mixer on medium speed, beat in the bananas, egg, cinnamon, vanilla extract, and milk until the mixture is well combined. (Don't be surprised at this point if the mixture looks really curdled...once you add the flour, it'll be fine!) Switch the mixer to low speed, and gradually beat in the flour, baking soda, baking powder, and kosher salt just until the batter is smooth, about 1 minute. Spread the batter into the prepared loaf pan.
  3. Bake in the preheated oven until the bread is set and lightly browned on top, about 40 minutes. (Mine took 50 minutes to bake, and some reviewers said their bread took closer to 60...just remember to watch it!) A toothpick inserted into the center of the loaf should come out clean. Let cool in the pan slightly, then remove to a wire rack to cool completely.

Thursday, August 19, 2010

MBCC: White Chocolate Raspberry Cheesecake Cupcakes

Phew! I was beginning to think I wouldn't get this entry in on time. What with school about to start and me working all the time, I really haven't had many chances to bake, but here I am with my entry and I'm happy I could make it! I'm going to apologize first of all. Because I had so little time, I didn't have time to take a bunch of photos, so I only have photos of the finished product. Eek! Sorry! But anyway, it's time for round 2 of Jamieanne's Mystery Box Cupcake Challenge and this month's ingredient was white chocolate! When I found out what the mystery ingredient was, I immediately began racking my brain to see how I could incorporate it. At first I thought candy bar. Maybe take a white chocolate candy bar and recreate it into a cupcake. But what bar? A Zero bar? A white chocolate Toblerone? But eventually, another combo hit me. What about white chocolate raspberry? The combination was inspired by an amazing cheesecake I had made before (which unfortunately I made before I started blogging), and as I got to thinking, I remembered that a while ago, I had made a recipe for a cheesecake flavored frosting and still had not gotten a chance to try it. Perfect! A white chocolate raspberry cheesecake cupcake! And then oh, I thought, why not go the whole nine yards and add a cookie crust to it? However, as I did these last minute, I didn't have time to grind the cookies and make a crust, so instead, I just put a whole vanilla wafer at the bottom of each cupcake liner and voila! It was perfect!

The cupcake isn't an actual cheesecake. Sometimes when people make "cheesecake cupcakes," they just make mini cheesecakes in cupcake liners. But this recipe is an actual cupcake. It's a white chocolate cupcake with white chocolate melted in and then chopped finely into the batter, sitting atop a vanilla wafer cookie. I used the cone method to fill it with raspberry preserves and then topped it off with a white chocolate cheesecake frosting. How is the frosting "cheesecake," you say? The secret is actually cheesecake flavored instant pudding! I got the idea a long time ago in order to try and make cream cheese frosting more appealing to myself. I've never been a fan of cream cheese, and although you add a bunch of sugar and flavoring to it in order to make a frosting, I've never cared much for cream cheese frosting either. Yet for some reason, I love cheesecake. Doesn't make sense, I know! So when I saw a cheesecake flavored instant pudding in the store one time, I thought that by adding it to a cream cheese frosting, I could make a tasty cheesecake flavored frosting that I actually liked. I threw some melted white chocolate in too to keep with the theme. I can't take too much credit for the cake recipe, because I only altered it slightly from a recipe I found on allrecipes, so I wanted to be sure to make up for it with this frosting, and I think I did!

White Chocolate Raspberry Cupcakes
(adapted from Clara's White German Chocolate Cake on allrecipes)
Makes about 24 cupcakes

Ingredients
  • About 24 vanilla wafers
  • 5 (1 ounce) squares white chocolate, chopped, divided
  • 2 1/2 cups sifted cake flour
  • 1 teaspoon baking powder
  • 1/2 teaspoon salt
  • 1 cup butter, softened
  • 1 1/2 cups white sugar
  • 4 egg yolks
  • 1 teaspoon vanilla extract
  • 1 cup buttermilk
  • 4 egg whites
  • 1/2 cup raspberry preserves
Directions
  1. Preheat oven to 350 degrees F. Line a cupcake pan with liners. In each liner, drop a whole vanilla wafer to act as the crust. Set aside.
  2. Sift together the flour, baking powder and salt (this will be the second time the flour is sifted). Set aside.
  3. In a small, microwave safe bowl, melt 4 squares of the white chocolate, preserving the last finely chopped square. Set the melted chocolate off to the side to cool slightly. In a large bowl, cream together the butter and sugar until light and fluffy. Beat in the yolks one at a time. Add the melted chocolate and vanilla and mix until well combined. Beat in the flour mixture alternately with the buttermilk. Fold in the remaining chopped chocolate.
  4. In a large bowl, beat egg whites until stiff peaks form. Fold 1/3 of the whites into the batter, then quickly fold in remaining whites until no streaks remain. Divide the batter among the cupcake liners, pouring on top of the vanilla wafers.
  5. Bake for about 20 minutes or until a toothpick inserted in the center comes out clean. Cool in the pan slightly then remove to wire racks to cool completely.
  6. When the cupcakes have cooled, cut small holes in the top using the cone method. Fill each one with about a teaspoon of raspberry preserves and place the "lids" back on.
White Chocolate Cheesecake Frosting (my own recipe)

Ingredients
  • 1 (8 ounce) package cream cheese
  • 1 box cheesecake flavored instant pudding
  • 2 ounces white chocolate, melted
  • 4 cups powdered sugar, plus more if needed
  • 2 tablespoons of milk, plus more if needed
  • 2 teaspoons vanilla extract
Directions
  1. In a large mixing bowl, cream the cream cheese until smooth. Add the box of cheesecake instant pudding mix and the melted white chocolate. Mix until well combined.
  2. Add the powdered sugar a little at a time and then add in the milk and vanilla. Turn the mixer up to medium and beat until well combined and fluffy. Use immediately to frost cupcakes.

For all the information on this contest, please visit Jamieanne's Mystery Box Cupcake Challenge info page right here.

The winner of August’s Mystery Box Cupcake Challenge will receive prizes from:
Thank you to all our prize sponsors!

Thursday, August 12, 2010

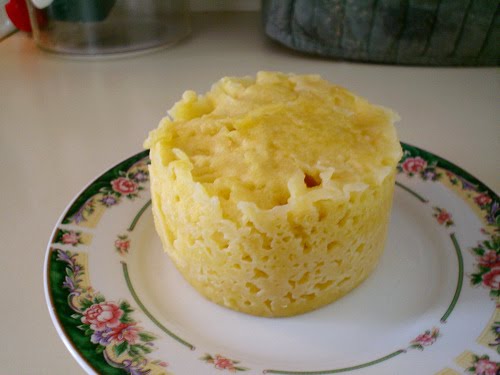
Microwave Yellow Mug Cake

It's been quite a while since I last posted, hasn't it? I apologize for that. I actually haven't been doing a lot of baking here recently, and when I have, they've been things I've already blogged about (like applesauce quick bread and Levain copycats...yum!). But now here I am with a new recipe. This one is as quick and easy as it gets when it comes to making sweets. I'm sure most of you have heard of the microwave mug cake by now. The chocolate one seems to be the most common one made. I've made it before a couple of times myself. But in all honesty, I was never too impressed with it. Sure, it was quick and easy to make, however, the texture was awfully rubbery and dense and the flavor just couldn't make up for it. I often ended up drowning it in a chocolate glaze just to make it edible. It wasn't horrible, but it was far from great. Just recently I got to thinking about it again and then thought, 'What about a yellow cake instead?' But could it end up being any better? I certainly think so!
The truth of the matter is, a cake made in the microwave will never be better than one made in the oven. EVER. However, this one is actually pretty good for being made in a microwave. After thinking about a yellow microwave mug cake, a quick search led me to this recipe, and it was the one I went with. The texture still wasn't perfect, however, I thought it was better. It produces a very dense slightly spongy cake that can only be expected since it's made in the microwave. However, the flavor was great, and paired with my go-to chocolate buttercream, it definitely satisfied my sweet tooth! Don't skimp on the flavoring is my advice. I used both vanilla extract and vanilla butter & nut flavoring (which is why my cake is extra yellow, since the flavoring contains yellow food coloring in it). It says just a dash in the recipe, but definitely go with at least a 1/2 teaspoon if you're using vanilla. Or if you're using a stronger flavored extract, adjust accordingly, but as I said, don't skimp! I'm looking forward to trying coconut and almond extracts in the future! Oh, and of course, be sure to use a really large mug. Here's the one I used compared to a normal sized mug.

Microwave Yellow Mug Cake (adapted from momoften's recipe on grouprecipes.com)
Makes one miniature cake that's actually big enough to share with 1 or 2 other people...however, if you want it all for yourself, I won't tell. ;)

Ingredients
  • 6 tablespoons all-purpose flour
  • 4 tablespoons (1/4 cup) sugar
  • 1/8 teaspoon baking powder
  • dash salt
  • 1 egg
  • 3 tablespoons milk or water
  • 3 tablespoons oil
  • dash vanilla extract (or whatever flavoring you like)
Directions
  1. In a small bowl, place the flour, sugar, baking powder, and salt and mix until combined.
  2. In another small bowl, whisk together the egg, milk or water, oil, and extract. Pour into the dry ingredients and whisk until combined.
  3. Spray a small amount of nonstick cooking spray into your mug and pour the cake batter in. (You can actually do this whole process in the mug if you don't want to dirty extra dishes. Just don't spray any cooking spray in it, then proceed to mix your dry and wet ingredients right in the mug.) Microwave for 2 1/2 to 3 minutes. (I only cooked mine for 2 1/2...I think the less you cook it, the less spongy it will be...just don't undercook.) Don't be alarmed if the cake at some point rises above the top of the mug. It will sink back down when you turn the microwave off.
  4. Remove from the mug and enjoy warm or allow it to cool and frost with your favorite frosting. (I used my go-to chocolate buttercream that I also used to frost almond cupcakes.)

Tuesday, July 27, 2010

Daring Bakers July 2010: Swiss Roll Ice Cream Cake

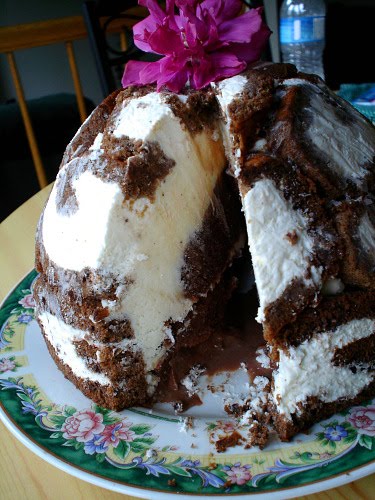
In my infinite knowledge (har har), I accidentally almost posted this yesterday! That wouldn't have been good, ha ha. I think I was just a bit frazzled. A huge storm came through my area on Sunday and knocked out my power, and my power didn't come back on until yesterday, 23 hours later! It was a rough bit, and I'm very glad that I made this ice cream cake a couple weeks ago, otherwise it most likely would have melted. Anyways, now that my confusion has been cleared up and I am indeed posting on the correct day, it's time to tell you about this month's Daring Bakers challenge. This is only my third DB challenge, but it was probably one that I was most excited for. I was a little worried at first, because I don't have an ice cream maker (though really want one), but I read that the poster of the recipe had made this recipe without one, so I was quite relieved. Like last time, all of the parts were very easy to put together, but this time, luckily nothing went astray!
This was the first time I've ever made a rolled cake. I was definitely a bit nervous. I still couldn't see how I could roll the cake without it breaking in two. But when the cakes came out of the oven, I certainly saw how! They were very spongy and pliable, and rolled up just fine. However, when they were cooled and I unrolled them to spread them with cream, surely enough, they were quite raggedy and slightly coming apart. Aha, but I said nothing really went astray, right? That's right. When I rolled the cakes back up with the cream, they certainly didn't look very pretty, but when I sliced into them and lined the bowl with them, they looked perfectly fine and nice (well, they could have been nicer, but not too bad for a first-timer). Woohoo! After that, everything went pretty quick and easy. Well, I say quick, but I mean putting them together. There was a lot of down time while making this, though. I assume if you had an ice cream maker, it would probably go a heck of a lot faster for you. Because I didn't have one, I used a method where I just put the ice cream bases in the freezer and as it froze, I took it out every once and a while and beat it with a wooden spoon. Though I have to admit I got a little slack...the ice cream took several hours to freeze totally! But I was happy to do it. Oh, and the hot fudge sauce? Probably the easiest, and very yummy!
So how did it taste? Very, very good! This is probably the most satisfied I've been with a DB challenge so far. In terms of taste, I think maybe the croquembouche was my favorite by just a slight hair, but the Swiss roll ice cream cake was delicious and much better looking than my croquembouche, so it wins for now. My only complaint would be that my favorite part of the cake was the one thing that there seemed to be the least amount of: the chocolate ice cream. Of course, Sunita, the daring baker who provided the challenge, did give us free reign on ice cream flavors, so I guess I'm to blame for that one. So I encourage you to give this recipe a try and don't be afraid to change up some of the flavors. There is lots of downtime, but it's certainly worth it in the end!

Swiss Roll Ice Cream Cake (inspired by the Swiss roll ice cream cake from Taste of Home; recipes developed by Sunita of Sunita’s world – life and food)
Makes 1 large cake

For the swiss rolls:
  • 6 medium sized eggs
  • 1 cup caster sugar
  • 6 tablespoons all-purpose flour
  • 5 tablespoons cocoa powder
  • 2 tablespoons boiling water
  • extra caster sugar or powdered sugar for rolling
  • oil for brushing the pans
For the cream filling:
  • 2 cups heavy whipping cream
  • 1 vanilla bean, cut into small pieces (or 1 teaspoon vanilla extract)
  • 5 tablespoons caster sugar
Directions
  1. For the cake: Preheat the oven to 400 degrees F. Brush two 9x11 inch baking pans with a little oil and line with greaseproof baking paper (okay, I looked and looked for 9x11 inch pans, but I'm just not sure if they sell them in the US, so I baked mine in an 8x11, which was the closest I could find). If you have just one pan, bake one cake and then let the pan cool completely before using it for the next cake.
  2. In a large mixing bowl, add the eggs and sugar and beat till very thick; when the beaters are lifted, it should leave a trail on the surface for at least 10 seconds.
  3. Add the flour mixture, in three batches and fold in gently with a spatula. Fold in the water.
  4. Divide the mixture among the two baking pans and spread it out evenly, into the corners of the pans. Place a pan in the center of the preheated oven and bake for about 10-12 minutes or till the center is springy to the touch.
  5. Spread a kitchen towel on the counter and sprinkle a little caster sugar (or powdered sugar) over it. Turn the cake on to the towel and peel away the baking paper. Trim any crisp edges. Starting from one of the shorter sides, start to make a roll with the towel going inside. Cool the wrapped roll on a rack, seam side down. Repeat for the next cake as well.
  6. For the cream filling: Grind together the vanilla pieces and sugar in a food processer till nicely mixed together. If you are using vanilla extract, just grind the sugar on its own and then add the sugar and extract to the cream.
  7. In a large bowl, add the cream and vanilla-sugar mixture and beat till very thick. Divide the cream mixture between the completely cooled cakes.
  8. Open the rolls and spread the cream mixture, making sure it does not go right to the edges (a border of ½ an inch should be fine). Roll the cakes up again, this time without the towel. Wrap in plastic wrap and chill in the fridge till needed, seam side down.
For the vanilla ice cream:
  • 2 1/2 cups heavy whipping cream
  • 1 vanilla bean, cut into piece or 1 teaspoon vanilla extract
  • 1/2 cup granulated sugar
Directions
  1. Grind together the sugar and vanilla in a food processor. In a mixing bowl, add the cream and vanilla sugar mixture and whisk lightly till everything is mixed together. If you are using the vanilla extract, grind the sugar on its own and then and the sugar along with the vanilla extract to the cream.
  2. Pour into a freezer friendly container and freeze till firm around the edges. Remove from the freezer, beat till smooth and return to the freezer. Do this 3-4 times and then set completely.
For the hot fudge sauce:
  • 1 cup caster sugar
  • 3 tablespoons cocoa powder
  • 2 tablespoons cornstarch
  • 1 1/2 cups water
  • 1 tablespoon butter
  • 1 teaspoon vanilla extract
Directions
  1. In a small saucepan, whisk together the sugar, cocoa powder, cornstarch and water.
  2. Place the pan over heat, and stir constantly, till it begins to thicken and is smooth (for about 2 minutes).
  3. Remove from heat and mix in the butter and vanilla. Keep aside to cool.
For the chocolate ice cream:
  • 2 cups heavy whipping cream
  • 1 cup caster sugar
  • 3 tablespoons cocoa powder
Directions
  1. Grind together the sugar and the cocoa powder in a food processor.
  2. In a saucepan, add all the ingredients and whisk lightly. Place the pan over heat and keep stirring till it begins to bubble around the edges.
  3. Remove from heat and cool completely before transferring to a freezer friendly container till firm around the edges. If you are using an ice cream maker, churn the ice cream according to the manufacturer’s instruction, after the mixture has cooled completely.
  4. Remove from the freezer, beat till smooth and return to the freezer. Do this 3-4 times and then set completely.
Assembly:
  1. Cut the Swiss rolls into about 20 equal slices (approximately 1 inch each).
  2. Cover the bottom and sides of the bowl in which you are going to set the dessert with cling film/plastic wrap. (I used my 4.5 quart Kitchen Aid bowl...it's about 8 1/2 inches in diameter and 6 1/2 inches deep.)
  3. Arrange two slices at the bottom of the pan, with their seam sides facing each other. Arrange the Swiss roll slices up the bowl, with the seam sides facing away from the bottom, to cover the sides of the bowl. Cover the bowl with plastic wrap and freeze till the slices are firm (at least 30 minutes).
  4. Soften the vanilla ice cream. Take the bowl out of the freezer, remove the cling film cover and add the ice cream on top of the cake slices. Spread it out to cover the bottom and sides of the bowl. Cover the bowl with plastic wrap and freeze till firm (at least 1 hour).
  5. Add the fudge sauce over the vanilla ice cream, cover and freeze till firm (at least an hour).
  6. Soften the chocolate ice cream and spread it over the fudge sauce. Cover with plastic wrap and freeze for at least 4-5 hours till completely set .
  7. Remove the plastic cover, and place the serving plate on top of the bowl. Turn it upside down and remove the bowl and the plastic lining. If the bowl does not come away easily, wipe the outsides of the bowl with a kitchen towel dampened with hot water. The bowl will come away easily.
  8. Keep the cake out of the freezer for at least 10 minutes before slicing, depending on how hot your region is. Slice with a sharp knife, dipped in hot water.
The July 2010 Daring Bakers’ challenge was hosted by Sunita of Sunita’s world – life and food. Sunita challenged everyone to make an ice-cream filled Swiss roll that’s then used to make a bombe with hot fudge. Her recipe is based on an ice cream cake recipe from Taste of Home.-

Friday, July 16, 2010

MBCC: Spiced Vanilla Honey Tea Cupcakes

I am beyond excited to share this recipe! But first, I should give a little background. The owner of a blog I really like to visit, Jamieanne of The Sweetest Kitchen, has decided to hold a cupcake competition each month. She's called it the Mystery Box Cupcake Challenge (which I have shortened to MBCC in the title), where each month there is a secret ingredient that is revealed and then competitors have to create a cupcake that incorporates this ingredient. This is the very first month and I immediately knew that if I got the time, I wanted to enter. At other blogs I like to visit, I've seen people competing in such cupcake competitions as Iron Cupcake, and I always wanted to try my hand at it because it seemed like a lot of fun. And not only that, but it would give me the chance to try and create my own recipes and expand my horizon as a baker. This competition has given me just the chance! I would encourage anyone to check it out as I have already had a lot of fun with this month's challenge and am going to continue entering each month that I get a chance! For all the info, Jamieanne has compiled all of the rules and guidelines right here.

So, onto the actual cupcake! This month's secret ingredient was tea. Tea! I'm not sure if I've ever mentioned it before, but I absolutely love tea. It's my favorite drink and we drink it like crazy at my house. We can make a huge pitcher of black tea and have it be gone or close to gone the next day. (And did I mention there's only 3 of us?) After my last adventure of creating my own coconut muffin recipe, I was super excited to try and create another recipe I could call my own. I started thinking of flavor combinations that I thought would be good. Spice, of course. But what about vanilla? And honey? How about all of them?! Sounds good to me! So I took my favorite yellow cake recipe and started tweaking and changing it to my liking.

For the spices, I knew I wanted cinnamon, and nutmeg sounded good too, but what about some ginger? I've actually never used ground ginger in a recipe before, but it sounded like it would be a good addition, so I added it in. I changed the regular sugar in the recipe to vanilla sugar and cut the sugar down a bit to replace some of it with honey. And of course, I put tea bags into the warm milk called for in the recipe to steep. For the frosting, I was thinking either a honey Swiss meringue buttercream or a cooked frosting that had spices in it. I've made a cooked frosting before and wasn't too sure if I liked it. I've been meaning to try one again to see if I like it any better, but because I knew that I already loved Swiss meringue buttercream, that one won. I knew that I had to go through multiple trials with my coconut muffins to get them perfect, so I was prepared to do so again with this recipe. So with a determination, I went off into my kitchen to bake.
After the batter was prepared, I tasted it. It was good! But still needed a little something extra. I doubled the cinnamon, and although I had initially decided not to add vanilla extract because I had already used vanilla sugar, I went ahead and added some anyway and tasted the batter again. Wow!! It was delicious! I never expected it to be that good. My spirits flew. Could these cupcakes actually turn out really good on the first try? I put them in the oven and crossed my fingers. I pulled them out and let them cool and then started on the SMBC. I subtracted a little sugar from my usual standards (1/4 cup of sugar per egg white) since I was adding honey. The butter remained at 1/4 cup per egg white. After making the cupcakes, I actually didn't have too much honey left. But that didn't matter as only a small amount sufficed just fine. My planned recipe had called for more, but it didn't need it. I added some vanilla to keep with the vanilla honey theme and it was delicious! So after frosting the cupcakes and snapping pictures, I bit into one. WOW! It was out of this world! And there are really no words to describe how proud of myself I was. The cupcakes were so tender and had lovely flavor and the buttercream was perfect for them. I am so thankful to Jamieanne's contest even if I don't win, because it has given me the chance to see that I can come up with my own recipes and have them turn out well, and allowed me to have so much fun and gain confidence as a baker at the same time. I look forward to entering her contest again and again!

Spiced Vanilla Honey Tea Cupcakes (original yellow cake recipe from A Passion for Baking by Marcy Goldman; all tweaks and changes made by yours truly)
Makes 12 cupcakes (**Again, I will warn you as I did with the coconut muffins, I have only ever made half of this recipe before, never the full recipe. But I will state again that I have never had problems scaling up or down recipes, so this full recipe should be fine.)

Ingredients
  • 1 cup milk
  • 2 black tea bags
  • 1/2 cup unsalted butter, softened
  • 3/4 cup vanilla sugar (If you don't have vanilla sugar, you can use regular granulated and increase the amount of vanilla extract to 2 teaspoons.)
  • 1/4 cup honey
  • 1 large egg
  • 1 teaspoon vanilla extract
  • 1 1/2 cups all-purpose flour
  • 2 teaspoons baking powder
  • 1/4 teaspoon salt
  • 1 teaspoon ground cinnamon
  • 1/4 teaspoon ground ginger
  • pinch ground nutmeg
Directions
  1. Preheat the oven to 350 degrees F. Line a standard cupcake pan with liners.
  2. In a small, microwave-safe, microwave the milk for about a minute or until hot. Remove from the microwave and add the tea bags. Let the tea bags steep in the milk as you prepare the other ingredients.
  3. In a large mixing bowl, cream the butter, sugar, and honey until light and fluffy. Add the egg and vanilla and mix well.
  4. In a medium bowl, mix together the flour, baking powder, salt, cinnamon, ginger, and nutmeg. Retrieve the tea-infused milk and squeeze out any milk that was absorbed by the tea bags back into the rest of the milk. With the mixture running, add the dry ingredients to the butter mixture alternately with the tea-infused milk. Mix just until combined.
  5. Divide the batter evenly between the cupcake liners and bake the cupcakes for 18-20 minutes or until a toothpick inserted in the center of one comes out clean. Let cool in the pan for about 5 minutes, then remove to a wire rack to cool completely.
Vanilla Honey Swiss Meringue Buttercream (from my own mind)
Makes enough to frost 12 cupcakes

Ingredients
  • 3 egg whites
  • 1/2 cup plus 2 tablespoons granulated sugar
  • pinch salt
  • 3/4 cup (1 1/2 sticks) unsalted butter, softened
  • 1 tablespoon honey
  • 1 1/2 teaspoons vanilla extract
Directions
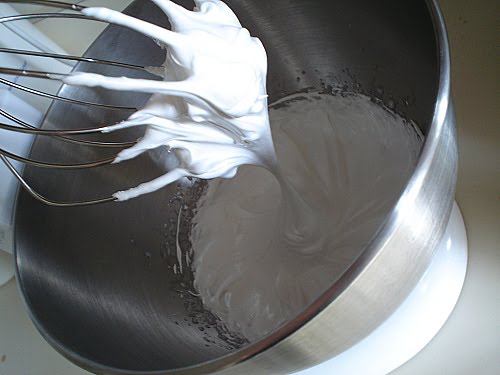
  1. Fill a large saucepan with about an inch of water and bring it to a simmer. In a heat friendly mixing bowl, place the egg whites, sugar, and salt, and fit the bowl over top of the pan, making sure that the simmering water does not touch the bottom of the bowl. Whisk the egg mixture constantly until a candy thermometer reads 160 degrees, about 5 minutes. If you don't have a candy thermometer, dip your finger into the egg mixture and rub it between your fingers. If it feels hot to the touch and it no longer feels grainy from the sugar, the mixture is ready.
  2. Place the egg mixture in a bowl of a stand mixer and fit the stand mixer with the whisk attachment. Whisk the mixture until it forms a meringue and comes to room temperature, about 5-7 minutes. (Feel the bowl in order to tell if it has come to room temperature. If the bowl no longer feels warm at all, it's good to go.)
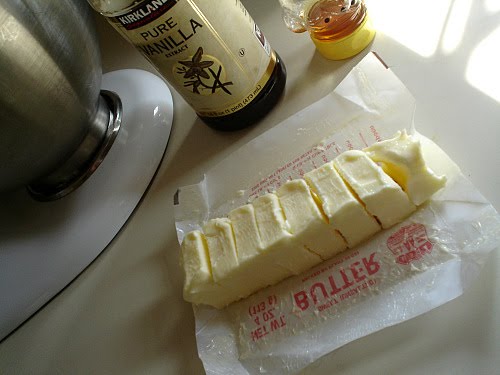
  3. Switch to the paddle attachment and put the mixer on low speed. Add the butter one tablespoon at a time, waiting a couple seconds between each tablespoon. Once all of the butter has been added, turn the mixer on high and beat it until it forms a smooth, creamy buttercream, about 6-10 minutes. If at any time the mixture looks curdled, don't be alarmed. This is normal; just keep beating and the mixture will come back together. Also, if it ever appears to be very soupy, again, keep mixing, it'll thicken up.
  4. Once the buttercream is smooth and creamy, add the honey and vanilla on low speed and continue mixing for a minute or two to completely incorporate the ingredients and to remove any air pockets. Use to frost cupcakes and enjoy!!

The winner of July’s Mystery Box Cupcake Challenge will receive prizes from:
Thank you to all our prize sponsors!